Introduction to the jupyter ecosystem & notebooks
Contents
Introduction to the jupyter ecosystem & notebooks
Before we get started …
most of what you’ll see within this lecture was prepared by Ross Markello, Michael Notter and Peer Herholz and further adapted for this course by Peer Herholz
based on Tal Yarkoni’s “Introduction to Python” lecture at Neurohackademy 2019
based on http://www.stavros.io/tutorials/python/ & http://www.swaroopch.com/notes/python
based on https://github.com/oesteban/biss2016 & https://github.com/jvns/pandas-cookbook
Objectives 📍
learn basic and efficient usage of the
jupyter ecosystem¬ebookswhat is
Jupyter& how to utilizejupyter notebooks
To Jupyter & beyond

a community of people
an ecosystem of open tools and standards for interactive computing
language-agnostic and modular
empower people to use other open tools
To Jupyter & beyond

Before we get started 2…
We’re going to be working in Jupyter notebooks for most of this presentation!
To load yours, do the following:
Open a terminal/shell & navigate to the folder where you stored the course material (
cd)
Type
jupyter notebook
If you’re not automatically directed to a webpage copy the URL (
https://....) printed in theterminaland paste it in yourbrowser
Files Tab
The files tab provides an interactive view of the portion of the filesystem which is accessible by the user. This is typically rooted by the directory in which the notebook server was started.
The top of the files list displays clickable breadcrumbs of the current directory. It is possible to navigate the filesystem by clicking on these breadcrumbs or on the directories displayed in the notebook list.
A new notebook can be created by clicking on the New dropdown button at the top of the list, and selecting the desired language kernel.
Notebooks can also be uploaded to the current directory by dragging a notebook file onto the list or by clicking the Upload button at the top of the list.
The Notebook
When a notebook is opened, a new browser tab will be created which presents the notebook user interface (UI). This UI allows for interactively editing and running the notebook document.
A new notebook can be created from the dashboard by clicking on the Files tab, followed by the New dropdown button, and then selecting the language of choice for the notebook.
An interactive tour of the notebook UI can be started by selecting Help -> User Interface Tour from the notebook menu bar.
Header
At the top of the notebook document is a header which contains the notebook title, a menubar, and toolbar. This header remains fixed at the top of the screen, even as the body of the notebook is scrolled. The title can be edited in-place (which renames the notebook file), and the menubar and toolbar contain a variety of actions which control notebook navigation and document structure.

Body
The body of a notebook is composed of cells. Each cell contains either markdown, code input, code output, or raw text. Cells can be included in any order and edited at-will, allowing for a large amount of flexibility for constructing a narrative.
Markdown cells- These are used to build anicely formatted narrativearound thecodein the document. The majority of this lesson is composed ofmarkdown cells.to get a
markdown cellyou can either select thecelland useesc+mor viaCell -> cell type -> markdown

Code cells- These are used to define thecomputational codein thedocument. They come intwo forms:the
input cellwhere theusertypes thecodeto beexecuted,and the
output cellwhich is therepresentationof theexecuted code. Depending on thecode, thisrepresentationmay be asimple scalar value, or something more complex like aplotor aninteractive widget.
to get a
code cellyou can either select thecelland useesc+yor viaCell -> cell type -> code
Raw cells- These are used whentextneeds to be included inraw form, withoutexecutionortransformation.
Modality
The notebook user interface is modal. This means that the keyboard behaves differently depending upon the current mode of the notebook. A notebook has two modes: edit and command.
Edit mode is indicated by a green cell border and a prompt showing in the editor area. When a cell is in edit mode, you can type into the cell, like a normal text editor.

Command mode is indicated by a grey cell border. When in command mode, the structure of the notebook can be modified as a whole, but the text in individual cells cannot be changed. Most importantly, the keyboard is mapped to a set of shortcuts for efficiently performing notebook and cell actions. For example, pressing c when in command mode, will copy the current cell; no modifier is needed.

Keyboard Navigation
The modal user interface of the IPython Notebook has been optimized for efficient keyboard usage. This is made possible by having two different sets of keyboard shortcuts: one set that is active in edit mode and another in command mode.
The most important keyboard shortcuts are Enter, which enters edit mode, and Esc, which enters command mode.
In edit mode, most of the keyboard is dedicated to typing into the cell's editor. Thus, in edit mode there are relatively few shortcuts. In command mode, the entire keyboard is available for shortcuts, so there are many more possibilities.
The following images give an overview of the available keyboard shortcuts. These can viewed in the notebook at any time via the Help -> Keyboard Shortcuts menu item.

The following shortcuts have been found to be the most useful in day-to-day tasks:
Basic navigation:
enter,shift-enter,up/k,down/jSaving the
notebook:sCell types:y,m,1-6,rCell creation:a,bCell editing:x,c,v,d,z,ctrl+shift+-Kernel operations:i,.
Markdown Cells
Text can be added to IPython Notebooks using Markdown cells. Markdown is a popular markup language that is a superset of HTML. Its specification can be found here:
http://daringfireball.net/projects/markdown/
You can view the source of a cell by double clicking on it, or while the cell is selected in command mode, press Enter to edit it. Once a cell has been edited, use Shift-Enter to re-render it.
Markdown basics
You can make text italic or bold.
You can build nested itemized or enumerated lists:
One
Sublist
This
Sublist - That - The other thing
Two
Sublist
Three
Sublist
Now another list:
Here we go
Sublist
Sublist
There we go
Now this
You can add horizontal rules:
Here is a blockquote:
Beautiful is better than ugly. Explicit is better than implicit. Simple is better than complex. Complex is better than complicated. Flat is better than nested. Sparse is better than dense. Readability counts. Special cases aren’t special enough to break the rules. Although practicality beats purity. Errors should never pass silently. Unless explicitly silenced. In the face of ambiguity, refuse the temptation to guess. There should be one– and preferably only one –obvious way to do it. Although that way may not be obvious at first unless you’re Dutch. Now is better than never. Although never is often better than right now. If the implementation is hard to explain, it’s a bad idea. If the implementation is easy to explain, it may be a good idea. Namespaces are one honking great idea – let’s do more of those!
You can add headings using Markdown’s syntax:
# Heading 1

# Heading 2

## Heading 2.1

## Heading 2.2
Embedded code
You can embed code meant for illustration instead of execution in Python:
def f(x):
    """a docstring"""
    return x**2
or other languages:
if (i=0; i<n; i++) {
  printf("hello %d\n", i);
  x += 4;
}
Github flavored markdown (GFM)
The Notebook webapp supports Github flavored markdown meaning that you can use triple backticks for code blocks
```python
print "Hello World"
```

```javascript
console.log("Hello World")
```
Gives
print "Hello World"
console.log("Hello World")
And a table like this :
| This | is   |
|------|------|
|   a  | table|
A nice HTML Table
This |
is |
|---|---|
a |
table |
General HTML
Because Markdown is a superset of HTML you can even add things like HTML tables:
| Header 1 | Header 2 |
|---|---|
| row 1, cell 1 | row 1, cell 2 |
| row 2, cell 1 | row 2, cell 2 |
Local files
If you have local files in your Notebook directory, you can refer to these files in Markdown cells directly:
[subdirectory/]<filename>
These do not embed the data into the notebook file, and require that the files exist when you are viewing the notebook.
Security of local files
Note that this means that the IPython notebook server also acts as a generic file server for files inside the same tree as your notebooks. Access is not granted outside the notebook folder so you have strict control over what files are visible, but for this reason it is highly recommended that you do not run the notebook server with a notebook directory at a high level in your filesystem (e.g. your home directory).
When you run the notebook in a password-protected manner, local file access is restricted to authenticated users unless read-only views are active.
Markdown attachments
Since Jupyter notebook version 5.0, in addition to referencing external files you can attach a file to a markdown cell. To do so drag the file from e.g. the browser or local storage in a markdown cell while editing it.
Files are stored in cell metadata and will be automatically scrubbed at save-time if not referenced. You can recognize attached images from other files by their url that starts with attachment.
Keep in mind that attached files will increase the size of your notebook.
You can manually edit the attachement by using the View > Cell Toolbar > Attachment menu, but you should not need to.
Code cells
When executing code in IPython, all valid Python syntax works as-is, but IPython provides a number of features designed to make the interactive experience more fluid and efficient. First, we need to explain how to run cells. Try to run the cell below!
import pandas as pd

print("Hi! This is a cell. Click on it and press the ▶ button above to run it")
Hi! This is a cell. Click on it and press the ▶ button above to run it
You can also run a cell with Ctrl+Enter or Shift+Enter. Experiment a bit with that.
Tab Completion
One of the most useful things about Jupyter Notebook is its tab completion.
Try this: click just after read_csv( in the cell below and press Shift+Tab 4 times, slowly. Note that if you’re using JupyterLab you don’t have an additional help box option.
pd.read_csv(
After the first time, you should see this:

After the second time:

After the fourth time, a big help box should pop up at the bottom of the screen, with the full documentation for the read_csv function:

This is amazingly useful. You can think of this as “the more confused I am, the more times I should press Shift+Tab”.
Okay, let’s try tab completion for function names!
pd.r
You should see this:

Get Help
There’s an additional way on how you can reach the help box shown above after the fourth Shift+Tab press. Instead, you can also use obj? or obj?? to get help or more help for an object.
pd.read_csv?
Signature:
pd.read_csv(
    filepath_or_buffer: 'FilePathOrBuffer',
    sep=<no_default>,
    delimiter=None,
    header='infer',
    names=<no_default>,
    index_col=None,
    usecols=None,
    squeeze=False,
    prefix=<no_default>,
    mangle_dupe_cols=True,
    dtype: 'DtypeArg | None' = None,
    engine=None,
    converters=None,
    true_values=None,
    false_values=None,
    skipinitialspace=False,
    skiprows=None,
    skipfooter=0,
    nrows=None,
    na_values=None,
    keep_default_na=True,
    na_filter=True,
    verbose=False,
    skip_blank_lines=True,
    parse_dates=False,
    infer_datetime_format=False,
    keep_date_col=False,
    date_parser=None,
    dayfirst=False,
    cache_dates=True,
    iterator=False,
    chunksize=None,
    compression='infer',
    thousands=None,
    decimal: 'str' = '.',
    lineterminator=None,
    quotechar='"',
    quoting=0,
    doublequote=True,
    escapechar=None,
    comment=None,
    encoding=None,
    encoding_errors: 'str | None' = 'strict',
    dialect=None,
    error_bad_lines=None,
    warn_bad_lines=None,
    on_bad_lines=None,
    delim_whitespace=False,
    low_memory=True,
    memory_map=False,
    float_precision=None,
    storage_options: 'StorageOptions' = None,
)
Docstring:
Read a comma-separated values (csv) file into DataFrame.

Also supports optionally iterating or breaking of the file
into chunks.

Additional help can be found in the online docs for
`IO Tools <https://pandas.pydata.org/pandas-docs/stable/user_guide/io.html>`_.

Parameters
----------
filepath_or_buffer : str, path object or file-like object
    Any valid string path is acceptable. The string could be a URL. Valid
    URL schemes include http, ftp, s3, gs, and file. For file URLs, a host is
    expected. A local file could be: file://localhost/path/to/table.csv.

    If you want to pass in a path object, pandas accepts any ``os.PathLike``.

    By file-like object, we refer to objects with a ``read()`` method, such as
    a file handle (e.g. via builtin ``open`` function) or ``StringIO``.
sep : str, default ','
    Delimiter to use. If sep is None, the C engine cannot automatically detect
    the separator, but the Python parsing engine can, meaning the latter will
    be used and automatically detect the separator by Python's builtin sniffer
    tool, ``csv.Sniffer``. In addition, separators longer than 1 character and
    different from ``'\s+'`` will be interpreted as regular expressions and
    will also force the use of the Python parsing engine. Note that regex
    delimiters are prone to ignoring quoted data. Regex example: ``'\r\t'``.
delimiter : str, default ``None``
    Alias for sep.
header : int, list of int, default 'infer'
    Row number(s) to use as the column names, and the start of the
    data.  Default behavior is to infer the column names: if no names
    are passed the behavior is identical to ``header=0`` and column
    names are inferred from the first line of the file, if column
    names are passed explicitly then the behavior is identical to
    ``header=None``. Explicitly pass ``header=0`` to be able to
    replace existing names. The header can be a list of integers that
    specify row locations for a multi-index on the columns
    e.g. [0,1,3]. Intervening rows that are not specified will be
    skipped (e.g. 2 in this example is skipped). Note that this
    parameter ignores commented lines and empty lines if
    ``skip_blank_lines=True``, so ``header=0`` denotes the first line of
    data rather than the first line of the file.
names : array-like, optional
    List of column names to use. If the file contains a header row,
    then you should explicitly pass ``header=0`` to override the column names.
    Duplicates in this list are not allowed.
index_col : int, str, sequence of int / str, or False, default ``None``
  Column(s) to use as the row labels of the ``DataFrame``, either given as
  string name or column index. If a sequence of int / str is given, a
  MultiIndex is used.

  Note: ``index_col=False`` can be used to force pandas to *not* use the first
  column as the index, e.g. when you have a malformed file with delimiters at
  the end of each line.
usecols : list-like or callable, optional
    Return a subset of the columns. If list-like, all elements must either
    be positional (i.e. integer indices into the document columns) or strings
    that correspond to column names provided either by the user in `names` or
    inferred from the document header row(s). For example, a valid list-like
    `usecols` parameter would be ``[0, 1, 2]`` or ``['foo', 'bar', 'baz']``.
    Element order is ignored, so ``usecols=[0, 1]`` is the same as ``[1, 0]``.
    To instantiate a DataFrame from ``data`` with element order preserved use
    ``pd.read_csv(data, usecols=['foo', 'bar'])[['foo', 'bar']]`` for columns
    in ``['foo', 'bar']`` order or
    ``pd.read_csv(data, usecols=['foo', 'bar'])[['bar', 'foo']]``
    for ``['bar', 'foo']`` order.

    If callable, the callable function will be evaluated against the column
    names, returning names where the callable function evaluates to True. An
    example of a valid callable argument would be ``lambda x: x.upper() in
    ['AAA', 'BBB', 'DDD']``. Using this parameter results in much faster
    parsing time and lower memory usage.
squeeze : bool, default False
    If the parsed data only contains one column then return a Series.
prefix : str, optional
    Prefix to add to column numbers when no header, e.g. 'X' for X0, X1, ...
mangle_dupe_cols : bool, default True
    Duplicate columns will be specified as 'X', 'X.1', ...'X.N', rather than
    'X'...'X'. Passing in False will cause data to be overwritten if there
    are duplicate names in the columns.
dtype : Type name or dict of column -> type, optional
    Data type for data or columns. E.g. {'a': np.float64, 'b': np.int32,
    'c': 'Int64'}
    Use `str` or `object` together with suitable `na_values` settings
    to preserve and not interpret dtype.
    If converters are specified, they will be applied INSTEAD
    of dtype conversion.
engine : {'c', 'python'}, optional
    Parser engine to use. The C engine is faster while the python engine is
    currently more feature-complete.
converters : dict, optional
    Dict of functions for converting values in certain columns. Keys can either
    be integers or column labels.
true_values : list, optional
    Values to consider as True.
false_values : list, optional
    Values to consider as False.
skipinitialspace : bool, default False
    Skip spaces after delimiter.
skiprows : list-like, int or callable, optional
    Line numbers to skip (0-indexed) or number of lines to skip (int)
    at the start of the file.

    If callable, the callable function will be evaluated against the row
    indices, returning True if the row should be skipped and False otherwise.
    An example of a valid callable argument would be ``lambda x: x in [0, 2]``.
skipfooter : int, default 0
    Number of lines at bottom of file to skip (Unsupported with engine='c').
nrows : int, optional
    Number of rows of file to read. Useful for reading pieces of large files.
na_values : scalar, str, list-like, or dict, optional
    Additional strings to recognize as NA/NaN. If dict passed, specific
    per-column NA values.  By default the following values are interpreted as
    NaN: '', '#N/A', '#N/A N/A', '#NA', '-1.#IND', '-1.#QNAN', '-NaN', '-nan',
    '1.#IND', '1.#QNAN', '<NA>', 'N/A', 'NA', 'NULL', 'NaN', 'n/a',
    'nan', 'null'.
keep_default_na : bool, default True
    Whether or not to include the default NaN values when parsing the data.
    Depending on whether `na_values` is passed in, the behavior is as follows:

    * If `keep_default_na` is True, and `na_values` are specified, `na_values`
      is appended to the default NaN values used for parsing.
    * If `keep_default_na` is True, and `na_values` are not specified, only
      the default NaN values are used for parsing.
    * If `keep_default_na` is False, and `na_values` are specified, only
      the NaN values specified `na_values` are used for parsing.
    * If `keep_default_na` is False, and `na_values` are not specified, no
      strings will be parsed as NaN.

    Note that if `na_filter` is passed in as False, the `keep_default_na` and
    `na_values` parameters will be ignored.
na_filter : bool, default True
    Detect missing value markers (empty strings and the value of na_values). In
    data without any NAs, passing na_filter=False can improve the performance
    of reading a large file.
verbose : bool, default False
    Indicate number of NA values placed in non-numeric columns.
skip_blank_lines : bool, default True
    If True, skip over blank lines rather than interpreting as NaN values.
parse_dates : bool or list of int or names or list of lists or dict, default False
    The behavior is as follows:

    * boolean. If True -> try parsing the index.
    * list of int or names. e.g. If [1, 2, 3] -> try parsing columns 1, 2, 3
      each as a separate date column.
    * list of lists. e.g.  If [[1, 3]] -> combine columns 1 and 3 and parse as
      a single date column.
    * dict, e.g. {'foo' : [1, 3]} -> parse columns 1, 3 as date and call
      result 'foo'

    If a column or index cannot be represented as an array of datetimes,
    say because of an unparsable value or a mixture of timezones, the column
    or index will be returned unaltered as an object data type. For
    non-standard datetime parsing, use ``pd.to_datetime`` after
    ``pd.read_csv``. To parse an index or column with a mixture of timezones,
    specify ``date_parser`` to be a partially-applied
    :func:`pandas.to_datetime` with ``utc=True``. See
    :ref:`io.csv.mixed_timezones` for more.

    Note: A fast-path exists for iso8601-formatted dates.
infer_datetime_format : bool, default False
    If True and `parse_dates` is enabled, pandas will attempt to infer the
    format of the datetime strings in the columns, and if it can be inferred,
    switch to a faster method of parsing them. In some cases this can increase
    the parsing speed by 5-10x.
keep_date_col : bool, default False
    If True and `parse_dates` specifies combining multiple columns then
    keep the original columns.
date_parser : function, optional
    Function to use for converting a sequence of string columns to an array of
    datetime instances. The default uses ``dateutil.parser.parser`` to do the
    conversion. Pandas will try to call `date_parser` in three different ways,
    advancing to the next if an exception occurs: 1) Pass one or more arrays
    (as defined by `parse_dates`) as arguments; 2) concatenate (row-wise) the
    string values from the columns defined by `parse_dates` into a single array
    and pass that; and 3) call `date_parser` once for each row using one or
    more strings (corresponding to the columns defined by `parse_dates`) as
    arguments.
dayfirst : bool, default False
    DD/MM format dates, international and European format.
cache_dates : bool, default True
    If True, use a cache of unique, converted dates to apply the datetime
    conversion. May produce significant speed-up when parsing duplicate
    date strings, especially ones with timezone offsets.

    .. versionadded:: 0.25.0
iterator : bool, default False
    Return TextFileReader object for iteration or getting chunks with
    ``get_chunk()``.

    .. versionchanged:: 1.2

       ``TextFileReader`` is a context manager.
chunksize : int, optional
    Return TextFileReader object for iteration.
    See the `IO Tools docs
    <https://pandas.pydata.org/pandas-docs/stable/io.html#io-chunking>`_
    for more information on ``iterator`` and ``chunksize``.

    .. versionchanged:: 1.2

       ``TextFileReader`` is a context manager.
compression : {'infer', 'gzip', 'bz2', 'zip', 'xz', None}, default 'infer'
    For on-the-fly decompression of on-disk data. If 'infer' and
    `filepath_or_buffer` is path-like, then detect compression from the
    following extensions: '.gz', '.bz2', '.zip', or '.xz' (otherwise no
    decompression). If using 'zip', the ZIP file must contain only one data
    file to be read in. Set to None for no decompression.
thousands : str, optional
    Thousands separator.
decimal : str, default '.'
    Character to recognize as decimal point (e.g. use ',' for European data).
lineterminator : str (length 1), optional
    Character to break file into lines. Only valid with C parser.
quotechar : str (length 1), optional
    The character used to denote the start and end of a quoted item. Quoted
    items can include the delimiter and it will be ignored.
quoting : int or csv.QUOTE_* instance, default 0
    Control field quoting behavior per ``csv.QUOTE_*`` constants. Use one of
    QUOTE_MINIMAL (0), QUOTE_ALL (1), QUOTE_NONNUMERIC (2) or QUOTE_NONE (3).
doublequote : bool, default ``True``
   When quotechar is specified and quoting is not ``QUOTE_NONE``, indicate
   whether or not to interpret two consecutive quotechar elements INSIDE a
   field as a single ``quotechar`` element.
escapechar : str (length 1), optional
    One-character string used to escape other characters.
comment : str, optional
    Indicates remainder of line should not be parsed. If found at the beginning
    of a line, the line will be ignored altogether. This parameter must be a
    single character. Like empty lines (as long as ``skip_blank_lines=True``),
    fully commented lines are ignored by the parameter `header` but not by
    `skiprows`. For example, if ``comment='#'``, parsing
    ``#empty\na,b,c\n1,2,3`` with ``header=0`` will result in 'a,b,c' being
    treated as the header.
encoding : str, optional
    Encoding to use for UTF when reading/writing (ex. 'utf-8'). `List of Python
    standard encodings
    <https://docs.python.org/3/library/codecs.html#standard-encodings>`_ .

    .. versionchanged:: 1.2

       When ``encoding`` is ``None``, ``errors="replace"`` is passed to
       ``open()``. Otherwise, ``errors="strict"`` is passed to ``open()``.
       This behavior was previously only the case for ``engine="python"``.

    .. versionchanged:: 1.3.0

       ``encoding_errors`` is a new argument. ``encoding`` has no longer an
       influence on how encoding errors are handled.

encoding_errors : str, optional, default "strict"
    How encoding errors are treated. `List of possible values
    <https://docs.python.org/3/library/codecs.html#error-handlers>`_ .

    .. versionadded:: 1.3.0

dialect : str or csv.Dialect, optional
    If provided, this parameter will override values (default or not) for the
    following parameters: `delimiter`, `doublequote`, `escapechar`,
    `skipinitialspace`, `quotechar`, and `quoting`. If it is necessary to
    override values, a ParserWarning will be issued. See csv.Dialect
    documentation for more details.
error_bad_lines : bool, default ``None``
    Lines with too many fields (e.g. a csv line with too many commas) will by
    default cause an exception to be raised, and no DataFrame will be returned.
    If False, then these "bad lines" will be dropped from the DataFrame that is
    returned.

    .. deprecated:: 1.3.0
       The ``on_bad_lines`` parameter should be used instead to specify behavior upon
       encountering a bad line instead.
warn_bad_lines : bool, default ``None``
    If error_bad_lines is False, and warn_bad_lines is True, a warning for each
    "bad line" will be output.

    .. deprecated:: 1.3.0
       The ``on_bad_lines`` parameter should be used instead to specify behavior upon
       encountering a bad line instead.
on_bad_lines : {'error', 'warn', 'skip'}, default 'error'
    Specifies what to do upon encountering a bad line (a line with too many fields).
    Allowed values are :

        - 'error', raise an Exception when a bad line is encountered.
        - 'warn', raise a warning when a bad line is encountered and skip that line.
        - 'skip', skip bad lines without raising or warning when they are encountered.

    .. versionadded:: 1.3.0

delim_whitespace : bool, default False
    Specifies whether or not whitespace (e.g. ``' '`` or ``'    '``) will be
    used as the sep. Equivalent to setting ``sep='\s+'``. If this option
    is set to True, nothing should be passed in for the ``delimiter``
    parameter.
low_memory : bool, default True
    Internally process the file in chunks, resulting in lower memory use
    while parsing, but possibly mixed type inference.  To ensure no mixed
    types either set False, or specify the type with the `dtype` parameter.
    Note that the entire file is read into a single DataFrame regardless,
    use the `chunksize` or `iterator` parameter to return the data in chunks.
    (Only valid with C parser).
memory_map : bool, default False
    If a filepath is provided for `filepath_or_buffer`, map the file object
    directly onto memory and access the data directly from there. Using this
    option can improve performance because there is no longer any I/O overhead.
float_precision : str, optional
    Specifies which converter the C engine should use for floating-point
    values. The options are ``None`` or 'high' for the ordinary converter,
    'legacy' for the original lower precision pandas converter, and
    'round_trip' for the round-trip converter.

    .. versionchanged:: 1.2

storage_options : dict, optional
    Extra options that make sense for a particular storage connection, e.g.
    host, port, username, password, etc. For HTTP(S) URLs the key-value pairs
    are forwarded to ``urllib`` as header options. For other URLs (e.g.
    starting with "s3://", and "gcs://") the key-value pairs are forwarded to
    ``fsspec``. Please see ``fsspec`` and ``urllib`` for more details.

    .. versionadded:: 1.2

Returns
-------
DataFrame or TextParser
    A comma-separated values (csv) file is returned as two-dimensional
    data structure with labeled axes.

See Also
--------
DataFrame.to_csv : Write DataFrame to a comma-separated values (csv) file.
read_csv : Read a comma-separated values (csv) file into DataFrame.
read_fwf : Read a table of fixed-width formatted lines into DataFrame.

Examples
--------
>>> pd.read_csv('data.csv')  # doctest: +SKIP
File:      ~/anaconda3/envs/pfp_2021/lib/python3.9/site-packages/pandas/io/parsers/readers.py
Type:      function
Writing code
Writing code in a notebook is pretty normal.
def print_10_nums():
    for i in range(10):
        print(i)
print_10_nums()
0
1
2
3
4
5
6
7
8
9
If you messed something up and want to revert to an older version of a code in a cell, use Ctrl+Z or to go than back Ctrl+Y.
For a full list of all keyboard shortcuts, click on the small keyboard icon in the notebook header or click on Help > Keyboard Shortcuts.
The interactive workflow: input, output, history
Notebooks provide various options for inputs and outputs, while also allowing to access the history of run commands.
2+10
12
_+10
22
You can suppress the storage and rendering of output if you append ; to the last cell (this comes in handy when plotting with matplotlib, for example):
10+20;
_
22
The output is stored in _N and Out[N] variables:
_8 == Out[8]
True
Previous inputs are available, too:
In[9]
'10+20;'
_i
'In[9]'
%history -n 1-5
   1:
import pandas as pd

print("Hi! This is a cell. Click on it and press the ▶ button above to run it")
   2: pd.read_csv(
   3:
import pandas as pd

print("Hi! This is a cell. Click on it and press the ▶ button above to run it")
   4: pd.read_csv?
   5:
def print_10_nums():
    for i in range(10):
        print(i)
Accessing the underlying operating system
Through notebooks you can also access the underlying operating system and communicate with it as you would do in e.g. a terminal via bash:
!pwd
/Users/peerherholz/google_drive/GitHub/DGPA_workshop_2022/workshop/prerequisites
files = !ls
print("My current directory's files:")
print(files)
My current directory's files:
['Predicting_age_with_machine_learning.ipynb', '__pycache__', 'demograhics_new.txt', 'demographics.csv', 'demographics.txt', 'demographics_new.csv', 'diffusion_imaging.ipynb', 'functional_connectivity.ipynb', 'image_manipulation_nibabel.ipynb', 'image_manipulation_nilearn.ipynb', 'intro_jupyter.ipynb', 'intro_python.ipynb', 'intro_to_shell.ipynb', 'machine_learning_keras.ipynb', 'machine_learning_nilearn.ipynb', 'machine_learning_preparation.ipynb', 'mymodule.py', 'python_numpy.ipynb', 'python_scikit.ipynb', 'python_scipy.ipynb', 'python_visualization_for_data.ipynb', 'statistical_analyses_MRI.ipynb']
!echo $files
[Predicting_age_with_machine_learning.ipynb, __pycache__, demograhics_new.txt, demographics.csv, demographics.txt, demographics_new.csv, diffusion_imaging.ipynb, functional_connectivity.ipynb, image_manipulation_nibabel.ipynb, image_manipulation_nilearn.ipynb, intro_jupyter.ipynb, intro_python.ipynb, intro_to_shell.ipynb, machine_learning_keras.ipynb, machine_learning_nilearn.ipynb, machine_learning_preparation.ipynb, mymodule.py, python_numpy.ipynb, python_scikit.ipynb, python_scipy.ipynb, python_visualization_for_data.ipynb, statistical_analyses_MRI.ipynb]
!echo {files[0].upper()}
PREDICTING_AGE_WITH_MACHINE_LEARNING.IPYNB
Magic functions
IPython has all kinds of magic functions. Magic functions are prefixed by % or %%, and typically take their arguments without parentheses, quotes or even commas for convenience. Line magics take a single % and cell magics are prefixed with two %%.
Some useful magic functions are:
Magic Name |
Effect |
|---|---|
%env |
Get, set, or list environment variables |
%pdb |
Control the automatic calling of the pdb interactive debugger |
%pylab |
Load numpy and matplotlib to work interactively |
%%debug |
Activates debugging mode in cell |
%%html |
Render the cell as a block of HTML |
%%latex |
Render the cell as a block of latex |
%%sh |
%%sh script magic |
%%time |
Time execution of a Python statement or expression |
You can run %magic to get a list of magic functions or %quickref for a reference sheet.
%magic
IPython's 'magic' functions
===========================
The magic function system provides a series of functions which allow you to
control the behavior of IPython itself, plus a lot of system-type
features. There are two kinds of magics, line-oriented and cell-oriented.
Line magics are prefixed with the % character and work much like OS
command-line calls: they get as an argument the rest of the line, where
arguments are passed without parentheses or quotes. For example, this will
time the given statement::
%timeit range(1000)
Cell magics are prefixed with a double %%, and they are functions that get as
an argument not only the rest of the line, but also the lines below it in a
separate argument. These magics are called with two arguments: the rest of the
call line and the body of the cell, consisting of the lines below the first.
For example::
%%timeit x = numpy.random.randn((100, 100))
numpy.linalg.svd(x)
will time the execution of the numpy svd routine, running the assignment of x
as part of the setup phase, which is not timed.
In a line-oriented client (the terminal or Qt console IPython), starting a new
input with %% will automatically enter cell mode, and IPython will continue
reading input until a blank line is given. In the notebook, simply type the
whole cell as one entity, but keep in mind that the %% escape can only be at
the very start of the cell.
NOTE: If you have 'automagic' enabled (via the command line option or with the
%automagic function), you don't need to type in the % explicitly for line
magics; cell magics always require an explicit '%%' escape. By default,
IPython ships with automagic on, so you should only rarely need the % escape.
Example: typing '%cd mydir' (without the quotes) changes your working directory
to 'mydir', if it exists.
For a list of the available magic functions, use %lsmagic. For a description
of any of them, type %magic_name?, e.g. '%cd?'.
Currently the magic system has the following functions:
%alias:
Define an alias for a system command.
'%alias alias_name cmd' defines 'alias_name' as an alias for 'cmd'
Then, typing 'alias_name params' will execute the system command 'cmd
params' (from your underlying operating system).
Aliases have lower precedence than magic functions and Python normal
variables, so if 'foo' is both a Python variable and an alias, the
alias can not be executed until 'del foo' removes the Python variable.
You can use the %l specifier in an alias definition to represent the
whole line when the alias is called. For example::
In [2]: alias bracket echo "Input in brackets: <%l>"
In [3]: bracket hello world
Input in brackets: <hello world>
You can also define aliases with parameters using %s specifiers (one
per parameter)::
In [1]: alias parts echo first %s second %s
In [2]: %parts A B
first A second B
In [3]: %parts A
Incorrect number of arguments: 2 expected.
parts is an alias to: 'echo first %s second %s'
Note that %l and %s are mutually exclusive. You can only use one or
the other in your aliases.
Aliases expand Python variables just like system calls using ! or !!
do: all expressions prefixed with '$' get expanded. For details of
the semantic rules, see PEP-215:
http://www.python.org/peps/pep-0215.html. This is the library used by
IPython for variable expansion. If you want to access a true shell
variable, an extra $ is necessary to prevent its expansion by
IPython::
In [6]: alias show echo
In [7]: PATH='A Python string'
In [8]: show $PATH
A Python string
In [9]: show $$PATH
/usr/local/lf9560/bin:/usr/local/intel/compiler70/ia32/bin:...
You can use the alias facility to access all of $PATH. See the %rehashx
function, which automatically creates aliases for the contents of your
$PATH.
If called with no parameters, %alias prints the current alias table
for your system. For posix systems, the default aliases are 'cat',
'cp', 'mv', 'rm', 'rmdir', and 'mkdir', and other platform-specific
aliases are added. For windows-based systems, the default aliases are
'copy', 'ddir', 'echo', 'ls', 'ldir', 'mkdir', 'ren', and 'rmdir'.
You can see the definition of alias by adding a question mark in the
end::
In [1]: cat?
Repr: <alias cat for 'cat'>
%alias_magic:
::
%alias_magic [-l] [-c] [-p PARAMS] name target
Create an alias for an existing line or cell magic.
Examples
--------
::
In [1]: %alias_magic t timeit
Created `%t` as an alias for `%timeit`.
Created `%%t` as an alias for `%%timeit`.
In [2]: %t -n1 pass
1 loops, best of 3: 954 ns per loop
In [3]: %%t -n1
...: pass
...:
1 loops, best of 3: 954 ns per loop
In [4]: %alias_magic --cell whereami pwd
UsageError: Cell magic function `%%pwd` not found.
In [5]: %alias_magic --line whereami pwd
Created `%whereami` as an alias for `%pwd`.
In [6]: %whereami
Out[6]: u'/home/testuser'
In [7]: %alias_magic h history "-p -l 30" --line
Created `%h` as an alias for `%history -l 30`.
positional arguments:
name Name of the magic to be created.
target Name of the existing line or cell magic.
optional arguments:
-l, --line Create a line magic alias.
-c, --cell Create a cell magic alias.
-p PARAMS, --params PARAMS
Parameters passed to the magic function.
%autoawait:
Allow to change the status of the autoawait option.
This allow you to set a specific asynchronous code runner.
If no value is passed, print the currently used asynchronous integration
and whether it is activated.
It can take a number of value evaluated in the following order:
- False/false/off deactivate autoawait integration
- True/true/on activate autoawait integration using configured default
loop
- asyncio/curio/trio activate autoawait integration and use integration
with said library.
- `sync` turn on the pseudo-sync integration (mostly used for
`IPython.embed()` which does not run IPython with a real eventloop and
deactivate running asynchronous code. Turning on Asynchronous code with
the pseudo sync loop is undefined behavior and may lead IPython to crash.
If the passed parameter does not match any of the above and is a python
identifier, get said object from user namespace and set it as the
runner, and activate autoawait.
If the object is a fully qualified object name, attempt to import it and
set it as the runner, and activate autoawait.
The exact behavior of autoawait is experimental and subject to change
across version of IPython and Python.
%autocall:
Make functions callable without having to type parentheses.
Usage:
%autocall [mode]
The mode can be one of: 0->Off, 1->Smart, 2->Full. If not given, the
value is toggled on and off (remembering the previous state).
In more detail, these values mean:
0 -> fully disabled
1 -> active, but do not apply if there are no arguments on the line.
In this mode, you get::
In [1]: callable
Out[1]: <built-in function callable>
In [2]: callable 'hello'
------> callable('hello')
Out[2]: False
2 -> Active always. Even if no arguments are present, the callable
object is called::
In [2]: float
------> float()
Out[2]: 0.0
Note that even with autocall off, you can still use '/' at the start of
a line to treat the first argument on the command line as a function
and add parentheses to it::
In [8]: /str 43
------> str(43)
Out[8]: '43'
# all-random (note for auto-testing)
%automagic:
Make magic functions callable without having to type the initial %.
Without arguments toggles on/off (when off, you must call it as
%automagic, of course). With arguments it sets the value, and you can
use any of (case insensitive):
- on, 1, True: to activate
- off, 0, False: to deactivate.
Note that magic functions have lowest priority, so if there's a
variable whose name collides with that of a magic fn, automagic won't
work for that function (you get the variable instead). However, if you
delete the variable (del var), the previously shadowed magic function
becomes visible to automagic again.
%autosave:
Set the autosave interval in the notebook (in seconds).
The default value is 120, or two minutes.
``%autosave 0`` will disable autosave.
This magic only has an effect when called from the notebook interface.
It has no effect when called in a startup file.
%bookmark:
Manage IPython's bookmark system.
%bookmark <name> - set bookmark to current dir
%bookmark <name> <dir> - set bookmark to <dir>
%bookmark -l - list all bookmarks
%bookmark -d <name> - remove bookmark
%bookmark -r - remove all bookmarks
You can later on access a bookmarked folder with::
%cd -b <name>
or simply '%cd <name>' if there is no directory called <name> AND
there is such a bookmark defined.
Your bookmarks persist through IPython sessions, but they are
associated with each profile.
%cat:
Alias for `!cat`
%cd:
Change the current working directory.
This command automatically maintains an internal list of directories
you visit during your IPython session, in the variable _dh. The
command %dhist shows this history nicely formatted. You can also
do 'cd -<tab>' to see directory history conveniently.
Usage:
cd 'dir': changes to directory 'dir'.
cd -: changes to the last visited directory.
cd -<n>: changes to the n-th directory in the directory history.
cd --foo: change to directory that matches 'foo' in history
cd -b <bookmark_name>: jump to a bookmark set by %bookmark
(note: cd <bookmark_name> is enough if there is no
directory <bookmark_name>, but a bookmark with the name exists.)
'cd -b <tab>' allows you to tab-complete bookmark names.
Options:
-q: quiet. Do not print the working directory after the cd command is
executed. By default IPython's cd command does print this directory,
since the default prompts do not display path information.
Note that !cd doesn't work for this purpose because the shell where
!command runs is immediately discarded after executing 'command'.
Examples
--------
::
In [10]: cd parent/child
/home/tsuser/parent/child
%clear:
Clear the terminal.
%colors:
Switch color scheme for prompts, info system and exception handlers.
Currently implemented schemes: NoColor, Linux, LightBG.
Color scheme names are not case-sensitive.
Examples
--------
To get a plain black and white terminal::
%colors nocolor
%conda:
Run the conda package manager within the current kernel.
Usage:
%conda install [pkgs]
%config:
configure IPython
%config Class[.trait=value]
This magic exposes most of the IPython config system. Any
Configurable class should be able to be configured with the simple
line::
%config Class.trait=value
Where `value` will be resolved in the user's namespace, if it is an
expression or variable name.
Examples
--------
To see what classes are available for config, pass no arguments::
In [1]: %config
Available objects for config:
TerminalInteractiveShell
HistoryManager
PrefilterManager
AliasManager
IPCompleter
DisplayFormatter
To view what is configurable on a given class, just pass the class
name::
In [2]: %config IPCompleter
IPCompleter options
-----------------
IPCompleter.omit__names=<Enum>
Current: 2
Choices: (0, 1, 2)
Instruct the completer to omit private method names
Specifically, when completing on ``object.<tab>``.
When 2 [default]: all names that start with '_' will be excluded.
When 1: all 'magic' names (``__foo__``) will be excluded.
When 0: nothing will be excluded.
IPCompleter.merge_completions=<CBool>
Current: True
Whether to merge completion results into a single list
If False, only the completion results from the first non-empty
completer will be returned.
IPCompleter.limit_to__all__=<CBool>
Current: False
Instruct the completer to use __all__ for the completion
Specifically, when completing on ``object.<tab>``.
When True: only those names in obj.__all__ will be included.
When False [default]: the __all__ attribute is ignored
IPCompleter.greedy=<CBool>
Current: False
Activate greedy completion
This will enable completion on elements of lists, results of
function calls, etc., but can be unsafe because the code is
actually evaluated on TAB.
but the real use is in setting values::
In [3]: %config IPCompleter.greedy = True
and these values are read from the user_ns if they are variables::
In [4]: feeling_greedy=False
In [5]: %config IPCompleter.greedy = feeling_greedy
%connect_info:
Print information for connecting other clients to this kernel
It will print the contents of this session's connection file, as well as
shortcuts for local clients.
In the simplest case, when called from the most recently launched kernel,
secondary clients can be connected, simply with:
$> jupyter <app> --existing
%cp:
Alias for `!cp`
%debug:
::
%debug [--breakpoint FILE:LINE] [statement ...]
Activate the interactive debugger.
This magic command support two ways of activating debugger.
One is to activate debugger before executing code. This way, you
can set a break point, to step through the code from the point.
You can use this mode by giving statements to execute and optionally
a breakpoint.
The other one is to activate debugger in post-mortem mode. You can
activate this mode simply running %debug without any argument.
If an exception has just occurred, this lets you inspect its stack
frames interactively. Note that this will always work only on the last
traceback that occurred, so you must call this quickly after an
exception that you wish to inspect has fired, because if another one
occurs, it clobbers the previous one.
If you want IPython to automatically do this on every exception, see
the %pdb magic for more details.
.. versionchanged:: 7.3
When running code, user variables are no longer expanded,
the magic line is always left unmodified.
positional arguments:
statement Code to run in debugger. You can omit this in cell
magic mode.
optional arguments:
--breakpoint <FILE:LINE>, -b <FILE:LINE>
Set break point at LINE in FILE.
%dhist:
Print your history of visited directories.
%dhist -> print full history
%dhist n -> print last n entries only
%dhist n1 n2 -> print entries between n1 and n2 (n2 not included)
This history is automatically maintained by the %cd command, and
always available as the global list variable _dh. You can use %cd -<n>
to go to directory number <n>.
Note that most of time, you should view directory history by entering
cd -<TAB>.
%dirs:
Return the current directory stack.
%doctest_mode:
Toggle doctest mode on and off.
This mode is intended to make IPython behave as much as possible like a
plain Python shell, from the perspective of how its prompts, exceptions
and output look. This makes it easy to copy and paste parts of a
session into doctests. It does so by:
- Changing the prompts to the classic ``>>>`` ones.
- Changing the exception reporting mode to 'Plain'.
- Disabling pretty-printing of output.
Note that IPython also supports the pasting of code snippets that have
leading '>>>' and '...' prompts in them. This means that you can paste
doctests from files or docstrings (even if they have leading
whitespace), and the code will execute correctly. You can then use
'%history -t' to see the translated history; this will give you the
input after removal of all the leading prompts and whitespace, which
can be pasted back into an editor.
With these features, you can switch into this mode easily whenever you
need to do testing and changes to doctests, without having to leave
your existing IPython session.
%ed:
Alias for `%edit`.
%edit:
Bring up an editor and execute the resulting code.
Usage:
%edit [options] [args]
%edit runs an external text editor. You will need to set the command for
this editor via the ``TerminalInteractiveShell.editor`` option in your
configuration file before it will work.
This command allows you to conveniently edit multi-line code right in
your IPython session.
If called without arguments, %edit opens up an empty editor with a
temporary file and will execute the contents of this file when you
close it (don't forget to save it!).
Options:
-n <number>
Open the editor at a specified line number. By default, the IPython
editor hook uses the unix syntax 'editor +N filename', but you can
configure this by providing your own modified hook if your favorite
editor supports line-number specifications with a different syntax.
-p
Call the editor with the same data as the previous time it was used,
regardless of how long ago (in your current session) it was.
-r
Use 'raw' input. This option only applies to input taken from the
user's history. By default, the 'processed' history is used, so that
magics are loaded in their transformed version to valid Python. If
this option is given, the raw input as typed as the command line is
used instead. When you exit the editor, it will be executed by
IPython's own processor.
Arguments:
If arguments are given, the following possibilities exist:
- The arguments are numbers or pairs of colon-separated numbers (like
1 4:8 9). These are interpreted as lines of previous input to be
loaded into the editor. The syntax is the same of the %macro command.
- If the argument doesn't start with a number, it is evaluated as a
variable and its contents loaded into the editor. You can thus edit
any string which contains python code (including the result of
previous edits).
- If the argument is the name of an object (other than a string),
IPython will try to locate the file where it was defined and open the
editor at the point where it is defined. You can use ``%edit function``
to load an editor exactly at the point where 'function' is defined,
edit it and have the file be executed automatically.
If the object is a macro (see %macro for details), this opens up your
specified editor with a temporary file containing the macro's data.
Upon exit, the macro is reloaded with the contents of the file.
Note: opening at an exact line is only supported under Unix, and some
editors (like kedit and gedit up to Gnome 2.8) do not understand the
'+NUMBER' parameter necessary for this feature. Good editors like
(X)Emacs, vi, jed, pico and joe all do.
- If the argument is not found as a variable, IPython will look for a
file with that name (adding .py if necessary) and load it into the
editor. It will execute its contents with execfile() when you exit,
loading any code in the file into your interactive namespace.
Unlike in the terminal, this is designed to use a GUI editor, and we do
not know when it has closed. So the file you edit will not be
automatically executed or printed.
Note that %edit is also available through the alias %ed.
%env:
Get, set, or list environment variables.
Usage:
%env: lists all environment variables/values
%env var: get value for var
%env var val: set value for var
%env var=val: set value for var
%env var=$val: set value for var, using python expansion if possible
%gui:
Enable or disable IPython GUI event loop integration.
%gui [GUINAME]
This magic replaces IPython's threaded shells that were activated
using the (pylab/wthread/etc.) command line flags. GUI toolkits
can now be enabled at runtime and keyboard
interrupts should work without any problems. The following toolkits
are supported: wxPython, PyQt4, PyGTK, Tk and Cocoa (OSX)::
%gui wx # enable wxPython event loop integration
%gui qt4|qt # enable PyQt4 event loop integration
%gui qt5 # enable PyQt5 event loop integration
%gui gtk # enable PyGTK event loop integration
%gui gtk3 # enable Gtk3 event loop integration
%gui gtk4 # enable Gtk4 event loop integration
%gui tk # enable Tk event loop integration
%gui osx # enable Cocoa event loop integration
# (requires %matplotlib 1.1)
%gui # disable all event loop integration
WARNING: after any of these has been called you can simply create
an application object, but DO NOT start the event loop yourself, as
we have already handled that.
%hist:
Alias for `%history`.
%history:
::
%history [-n] [-o] [-p] [-t] [-f FILENAME] [-g [PATTERN ...]]
[-l [LIMIT]] [-u]
[range ...]
Print input history (_i<n> variables), with most recent last.
By default, input history is printed without line numbers so it can be
directly pasted into an editor. Use -n to show them.
By default, all input history from the current session is displayed.
Ranges of history can be indicated using the syntax:
``4``
Line 4, current session
``4-6``
Lines 4-6, current session
``243/1-5``
Lines 1-5, session 243
``~2/7``
Line 7, session 2 before current
``~8/1-~6/5``
From the first line of 8 sessions ago, to the fifth line of 6
sessions ago.
Multiple ranges can be entered, separated by spaces
The same syntax is used by %macro, %save, %edit, %rerun
Examples
--------
::
In [6]: %history -n 4-6
4:a = 12
5:print a**2
6:%history -n 4-6
positional arguments:
range
optional arguments:
-n print line numbers for each input. This feature is only
available if numbered prompts are in use.
-o also print outputs for each input.
-p print classic '>>>' python prompts before each input.
This is useful for making documentation, and in
conjunction with -o, for producing doctest-ready output.
-t print the 'translated' history, as IPython understands
it. IPython filters your input and converts it all into
valid Python source before executing it (things like
magics or aliases are turned into function calls, for
example). With this option, you'll see the native
history instead of the user-entered version: '%cd /'
will be seen as 'get_ipython().run_line_magic("cd",
"/")' instead of '%cd /'.
-f FILENAME FILENAME: instead of printing the output to the screen,
redirect it to the given file. The file is always
overwritten, though *when it can*, IPython asks for
confirmation first. In particular, running the command
'history -f FILENAME' from the IPython Notebook
interface will replace FILENAME even if it already
exists *without* confirmation.
-g <[PATTERN ...]> treat the arg as a glob pattern to search for in (full)
history. This includes the saved history (almost all
commands ever written). The pattern may contain '?' to
match one unknown character and '*' to match any number
of unknown characters. Use '%hist -g' to show full saved
history (may be very long).
-l <[LIMIT]> get the last n lines from all sessions. Specify n as a
single arg, or the default is the last 10 lines.
-u when searching history using `-g`, show only unique
history.
%killbgscripts:
Kill all BG processes started by %%script and its family.
%ldir:
Alias for `!ls -F -G -l %l | grep /$`
%less:
Show a file through the pager.
Files ending in .py are syntax-highlighted.
%lf:
Alias for `!ls -F -l -G %l | grep ^-`
%lk:
Alias for `!ls -F -l -G %l | grep ^l`
%ll:
Alias for `!ls -F -l -G`
%load:
Load code into the current frontend.
Usage:
%load [options] source
where source can be a filename, URL, input history range, macro, or
element in the user namespace
Options:
-r <lines>: Specify lines or ranges of lines to load from the source.
Ranges could be specified as x-y (x..y) or in python-style x:y
(x..(y-1)). Both limits x and y can be left blank (meaning the
beginning and end of the file, respectively).
-s <symbols>: Specify function or classes to load from python source.
-y : Don't ask confirmation for loading source above 200 000 characters.
-n : Include the user's namespace when searching for source code.
This magic command can either take a local filename, a URL, an history
range (see %history) or a macro as argument, it will prompt for
confirmation before loading source with more than 200 000 characters, unless
-y flag is passed or if the frontend does not support raw_input::
%load myscript.py
%load 7-27
%load myMacro
%load http://www.example.com/myscript.py
%load -r 5-10 myscript.py
%load -r 10-20,30,40: foo.py
%load -s MyClass,wonder_function myscript.py
%load -n MyClass
%load -n my_module.wonder_function
%load_ext:
Load an IPython extension by its module name.
%loadpy:
Alias of `%load`
`%loadpy` has gained some flexibility and dropped the requirement of a `.py`
extension. So it has been renamed simply into %load. You can look at
`%load`'s docstring for more info.
%logoff:
Temporarily stop logging.
You must have previously started logging.
%logon:
Restart logging.
This function is for restarting logging which you've temporarily
stopped with %logoff. For starting logging for the first time, you
must use the %logstart function, which allows you to specify an
optional log filename.
%logstart:
Start logging anywhere in a session.
%logstart [-o|-r|-t|-q] [log_name [log_mode]]
If no name is given, it defaults to a file named 'ipython_log.py' in your
current directory, in 'rotate' mode (see below).
'%logstart name' saves to file 'name' in 'backup' mode. It saves your
history up to that point and then continues logging.
%logstart takes a second optional parameter: logging mode. This can be one
of (note that the modes are given unquoted):
append
Keep logging at the end of any existing file.
backup
Rename any existing file to name~ and start name.
global
Append to a single logfile in your home directory.
over
Overwrite any existing log.
rotate
Create rotating logs: name.1~, name.2~, etc.
Options:
-o
log also IPython's output. In this mode, all commands which
generate an Out[NN] prompt are recorded to the logfile, right after
their corresponding input line. The output lines are always
prepended with a '#[Out]# ' marker, so that the log remains valid
Python code.
Since this marker is always the same, filtering only the output from
a log is very easy, using for example a simple awk call::
awk -F'#\[Out\]# ' '{if($2) {print $2}}' ipython_log.py
-r
log 'raw' input. Normally, IPython's logs contain the processed
input, so that user lines are logged in their final form, converted
into valid Python. For example, %Exit is logged as
_ip.magic("Exit"). If the -r flag is given, all input is logged
exactly as typed, with no transformations applied.
-t
put timestamps before each input line logged (these are put in
comments).
-q
suppress output of logstate message when logging is invoked
%logstate:
Print the status of the logging system.
%logstop:
Fully stop logging and close log file.
In order to start logging again, a new %logstart call needs to be made,
possibly (though not necessarily) with a new filename, mode and other
options.
%ls:
Alias for `!ls -F -G`
%lsmagic:
List currently available magic functions.
%lx:
Alias for `!ls -F -l -G %l | grep ^-..x`
%macro:
Define a macro for future re-execution. It accepts ranges of history,
filenames or string objects.
Usage:
%macro [options] name n1-n2 n3-n4 ... n5 .. n6 ...
Options:
-r: use 'raw' input. By default, the 'processed' history is used,
so that magics are loaded in their transformed version to valid
Python. If this option is given, the raw input as typed at the
command line is used instead.
-q: quiet macro definition. By default, a tag line is printed
to indicate the macro has been created, and then the contents of
the macro are printed. If this option is given, then no printout
is produced once the macro is created.
This will define a global variable called `name` which is a string
made of joining the slices and lines you specify (n1,n2,... numbers
above) from your input history into a single string. This variable
acts like an automatic function which re-executes those lines as if
you had typed them. You just type 'name' at the prompt and the code
executes.
The syntax for indicating input ranges is described in %history.
Note: as a 'hidden' feature, you can also use traditional python slice
notation, where N:M means numbers N through M-1.
For example, if your history contains (print using %hist -n )::
44: x=1
45: y=3
46: z=x+y
47: print x
48: a=5
49: print 'x',x,'y',y
you can create a macro with lines 44 through 47 (included) and line 49
called my_macro with::
In [55]: %macro my_macro 44-47 49
Now, typing `my_macro` (without quotes) will re-execute all this code
in one pass.
You don't need to give the line-numbers in order, and any given line
number can appear multiple times. You can assemble macros with any
lines from your input history in any order.
The macro is a simple object which holds its value in an attribute,
but IPython's display system checks for macros and executes them as
code instead of printing them when you type their name.
You can view a macro's contents by explicitly printing it with::
print macro_name
%magic:
Print information about the magic function system.
Supported formats: -latex, -brief, -rest
%man:
Find the man page for the given command and display in pager.
%matplotlib:
::
%matplotlib [-l] [gui]
Set up matplotlib to work interactively.
This function lets you activate matplotlib interactive support
at any point during an IPython session. It does not import anything
into the interactive namespace.
If you are using the inline matplotlib backend in the IPython Notebook
you can set which figure formats are enabled using the following::
In [1]: from IPython.display import set_matplotlib_formats
In [2]: set_matplotlib_formats('pdf', 'svg')
The default for inline figures sets `bbox_inches` to 'tight'. This can
cause discrepancies between the displayed image and the identical
image created using `savefig`. This behavior can be disabled using the
`%config` magic::
In [3]: %config InlineBackend.print_figure_kwargs = {'bbox_inches':None}
In addition, see the docstring of
`IPython.display.set_matplotlib_formats` and
`IPython.display.set_matplotlib_close` for more information on
changing additional behaviors of the inline backend.
Examples
--------
To enable the inline backend for usage with the IPython Notebook::
In [1]: %matplotlib inline
In this case, where the matplotlib default is TkAgg::
In [2]: %matplotlib
Using matplotlib backend: TkAgg
But you can explicitly request a different GUI backend::
In [3]: %matplotlib qt
You can list the available backends using the -l/--list option::
In [4]: %matplotlib --list
Available matplotlib backends: ['osx', 'qt4', 'qt5', 'gtk3', 'gtk4', 'notebook', 'wx', 'qt', 'nbagg',
'gtk', 'tk', 'inline']
positional arguments:
gui Name of the matplotlib backend to use ('agg', 'gtk', 'gtk3',
'gtk4', 'inline', 'ipympl', 'nbagg', 'notebook', 'osx', 'pdf',
'ps', 'qt', 'qt4', 'qt5', 'qt6', 'svg', 'tk', 'widget', 'wx').
If given, the corresponding matplotlib backend is used,
otherwise it will be matplotlib's default (which you can set in
your matplotlib config file).
optional arguments:
-l, --list Show available matplotlib backends
%mkdir:
Alias for `!mkdir`
%more:
Show a file through the pager.
Files ending in .py are syntax-highlighted.
%mv:
Alias for `!mv`
%notebook:
::
%notebook filename
Export and convert IPython notebooks.
This function can export the current IPython history to a notebook file.
For example, to export the history to "foo.ipynb" do "%notebook foo.ipynb".
The -e or --export flag is deprecated in IPython 5.2, and will be
removed in the future.
positional arguments:
filename Notebook name or filename
%page:
Pretty print the object and display it through a pager.
%page [options] OBJECT
If no object is given, use _ (last output).
Options:
-r: page str(object), don't pretty-print it.
%pastebin:
Upload code to dpaste.com, returning the URL.
Usage:
%pastebin [-d "Custom description"][-e 24] 1-7
The argument can be an input history range, a filename, or the name of a
string or macro.
Options:
-d: Pass a custom description. The default will say
"Pasted from IPython".
-e: Pass number of days for the link to be expired.
The default will be 7 days.
%pdb:
Control the automatic calling of the pdb interactive debugger.
Call as '%pdb on', '%pdb 1', '%pdb off' or '%pdb 0'. If called without
argument it works as a toggle.
When an exception is triggered, IPython can optionally call the
interactive pdb debugger after the traceback printout. %pdb toggles
this feature on and off.
The initial state of this feature is set in your configuration
file (the option is ``InteractiveShell.pdb``).
If you want to just activate the debugger AFTER an exception has fired,
without having to type '%pdb on' and rerunning your code, you can use
the %debug magic.
%pdef:
Print the call signature for any callable object.
If the object is a class, print the constructor information.
Examples
--------
::
In [3]: %pdef urllib.urlopen
urllib.urlopen(url, data=None, proxies=None)
%pdoc:
Print the docstring for an object.
If the given object is a class, it will print both the class and the
constructor docstrings.
%pfile:
Print (or run through pager) the file where an object is defined.
The file opens at the line where the object definition begins. IPython
will honor the environment variable PAGER if set, and otherwise will
do its best to print the file in a convenient form.
If the given argument is not an object currently defined, IPython will
try to interpret it as a filename (automatically adding a .py extension
if needed). You can thus use %pfile as a syntax highlighting code
viewer.
%pinfo:
Provide detailed information about an object.
'%pinfo object' is just a synonym for object? or ?object.
%pinfo2:
Provide extra detailed information about an object.
'%pinfo2 object' is just a synonym for object?? or ??object.
%pip:
Run the pip package manager within the current kernel.
Usage:
%pip install [pkgs]
%popd:
Change to directory popped off the top of the stack.
%pprint:
Toggle pretty printing on/off.
%precision:
Set floating point precision for pretty printing.
Can set either integer precision or a format string.
If numpy has been imported and precision is an int,
numpy display precision will also be set, via ``numpy.set_printoptions``.
If no argument is given, defaults will be restored.
Examples
--------
::
In [1]: from math import pi
In [2]: %precision 3
Out[2]: u'%.3f'
In [3]: pi
Out[3]: 3.142
In [4]: %precision %i
Out[4]: u'%i'
In [5]: pi
Out[5]: 3
In [6]: %precision %e
Out[6]: u'%e'
In [7]: pi**10
Out[7]: 9.364805e+04
In [8]: %precision
Out[8]: u'%r'
In [9]: pi**10
Out[9]: 93648.047476082982
%prun:
Run a statement through the python code profiler.
Usage, in line mode:
%prun [options] statement
Usage, in cell mode:
%%prun [options] [statement]
code...
code...
In cell mode, the additional code lines are appended to the (possibly
empty) statement in the first line. Cell mode allows you to easily
profile multiline blocks without having to put them in a separate
function.
The given statement (which doesn't require quote marks) is run via the
python profiler in a manner similar to the profile.run() function.
Namespaces are internally managed to work correctly; profile.run
cannot be used in IPython because it makes certain assumptions about
namespaces which do not hold under IPython.
Options:
-l <limit>
you can place restrictions on what or how much of the
profile gets printed. The limit value can be:
* A string: only information for function names containing this string
is printed.
* An integer: only these many lines are printed.
* A float (between 0 and 1): this fraction of the report is printed
(for example, use a limit of 0.4 to see the topmost 40% only).
You can combine several limits with repeated use of the option. For
example, ``-l __init__ -l 5`` will print only the topmost 5 lines of
information about class constructors.
-r
return the pstats.Stats object generated by the profiling. This
object has all the information about the profile in it, and you can
later use it for further analysis or in other functions.
-s <key>
sort profile by given key. You can provide more than one key
by using the option several times: '-s key1 -s key2 -s key3...'. The
default sorting key is 'time'.
The following is copied verbatim from the profile documentation
referenced below:
When more than one key is provided, additional keys are used as
secondary criteria when the there is equality in all keys selected
before them.
Abbreviations can be used for any key names, as long as the
abbreviation is unambiguous. The following are the keys currently
defined:
============ =====================
Valid Arg Meaning
============ =====================
"calls" call count
"cumulative" cumulative time
"file" file name
"module" file name
"pcalls" primitive call count
"line" line number
"name" function name
"nfl" name/file/line
"stdname" standard name
"time" internal time
============ =====================
Note that all sorts on statistics are in descending order (placing
most time consuming items first), where as name, file, and line number
searches are in ascending order (i.e., alphabetical). The subtle
distinction between "nfl" and "stdname" is that the standard name is a
sort of the name as printed, which means that the embedded line
numbers get compared in an odd way. For example, lines 3, 20, and 40
would (if the file names were the same) appear in the string order
"20" "3" and "40". In contrast, "nfl" does a numeric compare of the
line numbers. In fact, sort_stats("nfl") is the same as
sort_stats("name", "file", "line").
-T <filename>
save profile results as shown on screen to a text
file. The profile is still shown on screen.
-D <filename>
save (via dump_stats) profile statistics to given
filename. This data is in a format understood by the pstats module, and
is generated by a call to the dump_stats() method of profile
objects. The profile is still shown on screen.
-q
suppress output to the pager. Best used with -T and/or -D above.
If you want to run complete programs under the profiler's control, use
``%run -p [prof_opts] filename.py [args to program]`` where prof_opts
contains profiler specific options as described here.
You can read the complete documentation for the profile module with::
In [1]: import profile; profile.help()
.. versionchanged:: 7.3
User variables are no longer expanded,
the magic line is always left unmodified.
%psearch:
Search for object in namespaces by wildcard.
%psearch [options] PATTERN [OBJECT TYPE]
Note: ? can be used as a synonym for %psearch, at the beginning or at
the end: both a*? and ?a* are equivalent to '%psearch a*'. Still, the
rest of the command line must be unchanged (options come first), so
for example the following forms are equivalent
%psearch -i a* function
-i a* function?
?-i a* function
Arguments:
PATTERN
where PATTERN is a string containing * as a wildcard similar to its
use in a shell. The pattern is matched in all namespaces on the
search path. By default objects starting with a single _ are not
matched, many IPython generated objects have a single
underscore. The default is case insensitive matching. Matching is
also done on the attributes of objects and not only on the objects
in a module.
[OBJECT TYPE]
Is the name of a python type from the types module. The name is
given in lowercase without the ending type, ex. StringType is
written string. By adding a type here only objects matching the
given type are matched. Using all here makes the pattern match all
types (this is the default).
Options:
-a: makes the pattern match even objects whose names start with a
single underscore. These names are normally omitted from the
search.
-i/-c: make the pattern case insensitive/sensitive. If neither of
these options are given, the default is read from your configuration
file, with the option ``InteractiveShell.wildcards_case_sensitive``.
If this option is not specified in your configuration file, IPython's
internal default is to do a case sensitive search.
-e/-s NAMESPACE: exclude/search a given namespace. The pattern you
specify can be searched in any of the following namespaces:
'builtin', 'user', 'user_global','internal', 'alias', where
'builtin' and 'user' are the search defaults. Note that you should
not use quotes when specifying namespaces.
-l: List all available object types for object matching. This function
can be used without arguments.
'Builtin' contains the python module builtin, 'user' contains all
user data, 'alias' only contain the shell aliases and no python
objects, 'internal' contains objects used by IPython. The
'user_global' namespace is only used by embedded IPython instances,
and it contains module-level globals. You can add namespaces to the
search with -s or exclude them with -e (these options can be given
more than once).
Examples
--------
::
%psearch a* -> objects beginning with an a
%psearch -e builtin a* -> objects NOT in the builtin space starting in a
%psearch a* function -> all functions beginning with an a
%psearch re.e* -> objects beginning with an e in module re
%psearch r*.e* -> objects that start with e in modules starting in r
%psearch r*.* string -> all strings in modules beginning with r
Case sensitive search::
%psearch -c a* list all object beginning with lower case a
Show objects beginning with a single _::
%psearch -a _* list objects beginning with a single underscore
List available objects::
%psearch -l list all available object types
%psource:
Print (or run through pager) the source code for an object.
%pushd:
Place the current dir on stack and change directory.
Usage:
%pushd ['dirname']
%pwd:
Return the current working directory path.
Examples
--------
::
In [9]: pwd
Out[9]: '/home/tsuser/sprint/ipython'
%pycat:
Show a syntax-highlighted file through a pager.
This magic is similar to the cat utility, but it will assume the file
to be Python source and will show it with syntax highlighting.
This magic command can either take a local filename, an url,
an history range (see %history) or a macro as argument ::
%pycat myscript.py
%pycat 7-27
%pycat myMacro
%pycat http://www.example.com/myscript.py
%pylab:
::
%pylab [--no-import-all] [gui]
Load numpy and matplotlib to work interactively.
This function lets you activate pylab (matplotlib, numpy and
interactive support) at any point during an IPython session.
%pylab makes the following imports::
import numpy
import matplotlib
from matplotlib import pylab, mlab, pyplot
np = numpy
plt = pyplot
from IPython.display import display
from IPython.core.pylabtools import figsize, getfigs
from pylab import *
from numpy import *
If you pass `--no-import-all`, the last two `*` imports will be excluded.
See the %matplotlib magic for more details about activating matplotlib
without affecting the interactive namespace.
positional arguments:
gui Name of the matplotlib backend to use ('agg', 'gtk',
'gtk3', 'gtk4', 'inline', 'ipympl', 'nbagg', 'notebook',
'osx', 'pdf', 'ps', 'qt', 'qt4', 'qt5', 'qt6', 'svg', 'tk',
'widget', 'wx'). If given, the corresponding matplotlib
backend is used, otherwise it will be matplotlib's default
(which you can set in your matplotlib config file).
optional arguments:
--no-import-all Prevent IPython from performing ``import *`` into the
interactive namespace. You can govern the default behavior
of this flag with the InteractiveShellApp.pylab_import_all
configurable.
%qtconsole:
Open a qtconsole connected to this kernel.
Useful for connecting a qtconsole to running notebooks, for better
debugging.
%quickref:
Show a quick reference sheet
%recall:
Repeat a command, or get command to input line for editing.
%recall and %rep are equivalent.
- %recall (no arguments):
Place a string version of last computation result (stored in the
special '_' variable) to the next input prompt. Allows you to create
elaborate command lines without using copy-paste::
In[1]: l = ["hei", "vaan"]
In[2]: "".join(l)
Out[2]: heivaan
In[3]: %recall
In[4]: heivaan_ <== cursor blinking
%recall 45
Place history line 45 on the next input prompt. Use %hist to find
out the number.
%recall 1-4
Combine the specified lines into one cell, and place it on the next
input prompt. See %history for the slice syntax.
%recall foo+bar
If foo+bar can be evaluated in the user namespace, the result is
placed at the next input prompt. Otherwise, the history is searched
for lines which contain that substring, and the most recent one is
placed at the next input prompt.
%rehashx:
Update the alias table with all executable files in $PATH.
rehashx explicitly checks that every entry in $PATH is a file
with execute access (os.X_OK).
Under Windows, it checks executability as a match against a
'|'-separated string of extensions, stored in the IPython config
variable win_exec_ext. This defaults to 'exe|com|bat'.
This function also resets the root module cache of module completer,
used on slow filesystems.
%reload_ext:
Reload an IPython extension by its module name.
%rep:
Alias for `%recall`.
%rerun:
Re-run previous input
By default, you can specify ranges of input history to be repeated
(as with %history). With no arguments, it will repeat the last line.
Options:
-l <n> : Repeat the last n lines of input, not including the
current command.
-g foo : Repeat the most recent line which contains foo
%reset:
Resets the namespace by removing all names defined by the user, if
called without arguments, or by removing some types of objects, such
as everything currently in IPython's In[] and Out[] containers (see
the parameters for details).
Parameters
----------
-f : force reset without asking for confirmation.
-s : 'Soft' reset: Only clears your namespace, leaving history intact.
References to objects may be kept. By default (without this option),
we do a 'hard' reset, giving you a new session and removing all
references to objects from the current session.
--aggressive: Try to aggressively remove modules from sys.modules ; this
may allow you to reimport Python modules that have been updated and
pick up changes, but can have unattended consequences.
in : reset input history
out : reset output history
dhist : reset directory history
array : reset only variables that are NumPy arrays
See Also
--------
reset_selective : invoked as ``%reset_selective``
Examples
--------
::
In [6]: a = 1
In [7]: a
Out[7]: 1
In [8]: 'a' in get_ipython().user_ns
Out[8]: True
In [9]: %reset -f
In [1]: 'a' in get_ipython().user_ns
Out[1]: False
In [2]: %reset -f in
Flushing input history
In [3]: %reset -f dhist in
Flushing directory history
Flushing input history
Notes
-----
Calling this magic from clients that do not implement standard input,
such as the ipython notebook interface, will reset the namespace
without confirmation.
%reset_selective:
Resets the namespace by removing names defined by the user.
Input/Output history are left around in case you need them.
%reset_selective [-f] regex
No action is taken if regex is not included
Options
-f : force reset without asking for confirmation.
See Also
--------
reset : invoked as ``%reset``
Examples
--------
We first fully reset the namespace so your output looks identical to
this example for pedagogical reasons; in practice you do not need a
full reset::
In [1]: %reset -f
Now, with a clean namespace we can make a few variables and use
``%reset_selective`` to only delete names that match our regexp::
In [2]: a=1; b=2; c=3; b1m=4; b2m=5; b3m=6; b4m=7; b2s=8
In [3]: who_ls
Out[3]: ['a', 'b', 'b1m', 'b2m', 'b2s', 'b3m', 'b4m', 'c']
In [4]: %reset_selective -f b[2-3]m
In [5]: who_ls
Out[5]: ['a', 'b', 'b1m', 'b2s', 'b4m', 'c']
In [6]: %reset_selective -f d
In [7]: who_ls
Out[7]: ['a', 'b', 'b1m', 'b2s', 'b4m', 'c']
In [8]: %reset_selective -f c
In [9]: who_ls
Out[9]: ['a', 'b', 'b1m', 'b2s', 'b4m']
In [10]: %reset_selective -f b
In [11]: who_ls
Out[11]: ['a']
Notes
-----
Calling this magic from clients that do not implement standard input,
such as the ipython notebook interface, will reset the namespace
without confirmation.
%rm:
Alias for `!rm`
%rmdir:
Alias for `!rmdir`
%run:
Run the named file inside IPython as a program.
Usage::
%run [-n -i -e -G]
[( -t [-N<N>] | -d [-b<N>] | -p [profile options] )]
( -m mod | file ) [args]
Parameters after the filename are passed as command-line arguments to
the program (put in sys.argv). Then, control returns to IPython's
prompt.
This is similar to running at a system prompt ``python file args``,
but with the advantage of giving you IPython's tracebacks, and of
loading all variables into your interactive namespace for further use
(unless -p is used, see below).
The file is executed in a namespace initially consisting only of
``__name__=='__main__'`` and sys.argv constructed as indicated. It thus
sees its environment as if it were being run as a stand-alone program
(except for sharing global objects such as previously imported
modules). But after execution, the IPython interactive namespace gets
updated with all variables defined in the program (except for __name__
and sys.argv). This allows for very convenient loading of code for
interactive work, while giving each program a 'clean sheet' to run in.
Arguments are expanded using shell-like glob match. Patterns
'*', '?', '[seq]' and '[!seq]' can be used. Additionally,
tilde '~' will be expanded into user's home directory. Unlike
real shells, quotation does not suppress expansions. Use
*two* back slashes (e.g. ``\\*``) to suppress expansions.
To completely disable these expansions, you can use -G flag.
On Windows systems, the use of single quotes `'` when specifying
a file is not supported. Use double quotes `"`.
Options:
-n
__name__ is NOT set to '__main__', but to the running file's name
without extension (as python does under import). This allows running
scripts and reloading the definitions in them without calling code
protected by an ``if __name__ == "__main__"`` clause.
-i
run the file in IPython's namespace instead of an empty one. This
is useful if you are experimenting with code written in a text editor
which depends on variables defined interactively.
-e
ignore sys.exit() calls or SystemExit exceptions in the script
being run. This is particularly useful if IPython is being used to
run unittests, which always exit with a sys.exit() call. In such
cases you are interested in the output of the test results, not in
seeing a traceback of the unittest module.
-t
print timing information at the end of the run. IPython will give
you an estimated CPU time consumption for your script, which under
Unix uses the resource module to avoid the wraparound problems of
time.clock(). Under Unix, an estimate of time spent on system tasks
is also given (for Windows platforms this is reported as 0.0).
If -t is given, an additional ``-N<N>`` option can be given, where <N>
must be an integer indicating how many times you want the script to
run. The final timing report will include total and per run results.
For example (testing the script uniq_stable.py)::
In [1]: run -t uniq_stable
IPython CPU timings (estimated):
User : 0.19597 s.
System: 0.0 s.
In [2]: run -t -N5 uniq_stable
IPython CPU timings (estimated):
Total runs performed: 5
Times : Total Per run
User : 0.910862 s, 0.1821724 s.
System: 0.0 s, 0.0 s.
-d
run your program under the control of pdb, the Python debugger.
This allows you to execute your program step by step, watch variables,
etc. Internally, what IPython does is similar to calling::
pdb.run('execfile("YOURFILENAME")')
with a breakpoint set on line 1 of your file. You can change the line
number for this automatic breakpoint to be <N> by using the -bN option
(where N must be an integer). For example::
%run -d -b40 myscript
will set the first breakpoint at line 40 in myscript.py. Note that
the first breakpoint must be set on a line which actually does
something (not a comment or docstring) for it to stop execution.
Or you can specify a breakpoint in a different file::
%run -d -b myotherfile.py:20 myscript
When the pdb debugger starts, you will see a (Pdb) prompt. You must
first enter 'c' (without quotes) to start execution up to the first
breakpoint.
Entering 'help' gives information about the use of the debugger. You
can easily see pdb's full documentation with "import pdb;pdb.help()"
at a prompt.
-p
run program under the control of the Python profiler module (which
prints a detailed report of execution times, function calls, etc).
You can pass other options after -p which affect the behavior of the
profiler itself. See the docs for %prun for details.
In this mode, the program's variables do NOT propagate back to the
IPython interactive namespace (because they remain in the namespace
where the profiler executes them).
Internally this triggers a call to %prun, see its documentation for
details on the options available specifically for profiling.
There is one special usage for which the text above doesn't apply:
if the filename ends with .ipy[nb], the file is run as ipython script,
just as if the commands were written on IPython prompt.
-m
specify module name to load instead of script path. Similar to
the -m option for the python interpreter. Use this option last if you
want to combine with other %run options. Unlike the python interpreter
only source modules are allowed no .pyc or .pyo files.
For example::
%run -m example
will run the example module.
-G
disable shell-like glob expansion of arguments.
%save:
Save a set of lines or a macro to a given filename.
Usage:
%save [options] filename n1-n2 n3-n4 ... n5 .. n6 ...
Options:
-r: use 'raw' input. By default, the 'processed' history is used,
so that magics are loaded in their transformed version to valid
Python. If this option is given, the raw input as typed as the
command line is used instead.
-f: force overwrite. If file exists, %save will prompt for overwrite
unless -f is given.
-a: append to the file instead of overwriting it.
This function uses the same syntax as %history for input ranges,
then saves the lines to the filename you specify.
It adds a '.py' extension to the file if you don't do so yourself, and
it asks for confirmation before overwriting existing files.
If `-r` option is used, the default extension is `.ipy`.
%sc:
Shell capture - run shell command and capture output (DEPRECATED use !).
DEPRECATED. Suboptimal, retained for backwards compatibility.
You should use the form 'var = !command' instead. Example:
"%sc -l myfiles = ls ~" should now be written as
"myfiles = !ls ~"
myfiles.s, myfiles.l and myfiles.n still apply as documented
below.
--
%sc [options] varname=command
IPython will run the given command using commands.getoutput(), and
will then update the user's interactive namespace with a variable
called varname, containing the value of the call. Your command can
contain shell wildcards, pipes, etc.
The '=' sign in the syntax is mandatory, and the variable name you
supply must follow Python's standard conventions for valid names.
(A special format without variable name exists for internal use)
Options:
-l: list output. Split the output on newlines into a list before
assigning it to the given variable. By default the output is stored
as a single string.
-v: verbose. Print the contents of the variable.
In most cases you should not need to split as a list, because the
returned value is a special type of string which can automatically
provide its contents either as a list (split on newlines) or as a
space-separated string. These are convenient, respectively, either
for sequential processing or to be passed to a shell command.
For example::
# Capture into variable a
In [1]: sc a=ls *py
# a is a string with embedded newlines
In [2]: a
Out[2]: 'setup.py\nwin32_manual_post_install.py'
# which can be seen as a list:
In [3]: a.l
Out[3]: ['setup.py', 'win32_manual_post_install.py']
# or as a whitespace-separated string:
In [4]: a.s
Out[4]: 'setup.py win32_manual_post_install.py'
# a.s is useful to pass as a single command line:
In [5]: !wc -l $a.s
146 setup.py
130 win32_manual_post_install.py
276 total
# while the list form is useful to loop over:
In [6]: for f in a.l:
...: !wc -l $f
...:
146 setup.py
130 win32_manual_post_install.py
Similarly, the lists returned by the -l option are also special, in
the sense that you can equally invoke the .s attribute on them to
automatically get a whitespace-separated string from their contents::
In [7]: sc -l b=ls *py
In [8]: b
Out[8]: ['setup.py', 'win32_manual_post_install.py']
In [9]: b.s
Out[9]: 'setup.py win32_manual_post_install.py'
In summary, both the lists and strings used for output capture have
the following special attributes::
.l (or .list) : value as list.
.n (or .nlstr): value as newline-separated string.
.s (or .spstr): value as space-separated string.
%set_env:
Set environment variables. Assumptions are that either "val" is a
name in the user namespace, or val is something that evaluates to a
string.
Usage:
%set_env var val: set value for var
%set_env var=val: set value for var
%set_env var=$val: set value for var, using python expansion if possible
%store:
Lightweight persistence for python variables.
Example::
In [1]: l = ['hello',10,'world']
In [2]: %store l
In [3]: exit
(IPython session is closed and started again...)
ville@badger:~$ ipython
In [1]: l
NameError: name 'l' is not defined
In [2]: %store -r
In [3]: l
Out[3]: ['hello', 10, 'world']
Usage:
* ``%store`` - Show list of all variables and their current
values
* ``%store spam bar`` - Store the *current* value of the variables spam
and bar to disk
* ``%store -d spam`` - Remove the variable and its value from storage
* ``%store -z`` - Remove all variables from storage
* ``%store -r`` - Refresh all variables, aliases and directory history
from store (overwrite current vals)
* ``%store -r spam bar`` - Refresh specified variables and aliases from store
(delete current val)
* ``%store foo >a.txt`` - Store value of foo to new file a.txt
* ``%store foo >>a.txt`` - Append value of foo to file a.txt
It should be noted that if you change the value of a variable, you
need to %store it again if you want to persist the new value.
Note also that the variables will need to be pickleable; most basic
python types can be safely %store'd.
Also aliases can be %store'd across sessions.
To remove an alias from the storage, use the %unalias magic.
%sx:
Shell execute - run shell command and capture output (!! is short-hand).
%sx command
IPython will run the given command using commands.getoutput(), and
return the result formatted as a list (split on '\n'). Since the
output is _returned_, it will be stored in ipython's regular output
cache Out[N] and in the '_N' automatic variables.
Notes:
1) If an input line begins with '!!', then %sx is automatically
invoked. That is, while::
!ls
causes ipython to simply issue system('ls'), typing::
!!ls
is a shorthand equivalent to::
%sx ls
2) %sx differs from %sc in that %sx automatically splits into a list,
like '%sc -l'. The reason for this is to make it as easy as possible
to process line-oriented shell output via further python commands.
%sc is meant to provide much finer control, but requires more
typing.
3) Just like %sc -l, this is a list with special attributes:
::
.l (or .list) : value as list.
.n (or .nlstr): value as newline-separated string.
.s (or .spstr): value as whitespace-separated string.
This is very useful when trying to use such lists as arguments to
system commands.
%system:
Shell execute - run shell command and capture output (!! is short-hand).
%sx command
IPython will run the given command using commands.getoutput(), and
return the result formatted as a list (split on '\n'). Since the
output is _returned_, it will be stored in ipython's regular output
cache Out[N] and in the '_N' automatic variables.
Notes:
1) If an input line begins with '!!', then %sx is automatically
invoked. That is, while::
!ls
causes ipython to simply issue system('ls'), typing::
!!ls
is a shorthand equivalent to::
%sx ls
2) %sx differs from %sc in that %sx automatically splits into a list,
like '%sc -l'. The reason for this is to make it as easy as possible
to process line-oriented shell output via further python commands.
%sc is meant to provide much finer control, but requires more
typing.
3) Just like %sc -l, this is a list with special attributes:
::
.l (or .list) : value as list.
.n (or .nlstr): value as newline-separated string.
.s (or .spstr): value as whitespace-separated string.
This is very useful when trying to use such lists as arguments to
system commands.
%tb:
Print the last traceback.
Optionally, specify an exception reporting mode, tuning the
verbosity of the traceback. By default the currently-active exception
mode is used. See %xmode for changing exception reporting modes.
Valid modes: Plain, Context, Verbose, and Minimal.
%time:
Time execution of a Python statement or expression.
The CPU and wall clock times are printed, and the value of the
expression (if any) is returned. Note that under Win32, system time
is always reported as 0, since it can not be measured.
This function can be used both as a line and cell magic:
- In line mode you can time a single-line statement (though multiple
ones can be chained with using semicolons).
- In cell mode, you can time the cell body (a directly
following statement raises an error).
This function provides very basic timing functionality. Use the timeit
magic for more control over the measurement.
.. versionchanged:: 7.3
User variables are no longer expanded,
the magic line is always left unmodified.
Examples
--------
::
In [1]: %time 2**128
CPU times: user 0.00 s, sys: 0.00 s, total: 0.00 s
Wall time: 0.00
Out[1]: 340282366920938463463374607431768211456L
In [2]: n = 1000000
In [3]: %time sum(range(n))
CPU times: user 1.20 s, sys: 0.05 s, total: 1.25 s
Wall time: 1.37
Out[3]: 499999500000L
In [4]: %time print 'hello world'
hello world
CPU times: user 0.00 s, sys: 0.00 s, total: 0.00 s
Wall time: 0.00
.. note::
The time needed by Python to compile the given expression will be
reported if it is more than 0.1s.
In the example below, the actual exponentiation is done by Python
at compilation time, so while the expression can take a noticeable
amount of time to compute, that time is purely due to the
compilation::
In [5]: %time 3**9999;
CPU times: user 0.00 s, sys: 0.00 s, total: 0.00 s
Wall time: 0.00 s
In [6]: %time 3**999999;
CPU times: user 0.00 s, sys: 0.00 s, total: 0.00 s
Wall time: 0.00 s
Compiler : 0.78 s
%timeit:
Time execution of a Python statement or expression
Usage, in line mode:
%timeit [-n<N> -r<R> [-t|-c] -q -p<P> -o] statement
or in cell mode:
%%timeit [-n<N> -r<R> [-t|-c] -q -p<P> -o] setup_code
code
code...
Time execution of a Python statement or expression using the timeit
module. This function can be used both as a line and cell magic:
- In line mode you can time a single-line statement (though multiple
ones can be chained with using semicolons).
- In cell mode, the statement in the first line is used as setup code
(executed but not timed) and the body of the cell is timed. The cell
body has access to any variables created in the setup code.
Options:
-n<N>: execute the given statement <N> times in a loop. If <N> is not
provided, <N> is determined so as to get sufficient accuracy.
-r<R>: number of repeats <R>, each consisting of <N> loops, and take the
best result.
Default: 7
-t: use time.time to measure the time, which is the default on Unix.
This function measures wall time.
-c: use time.clock to measure the time, which is the default on
Windows and measures wall time. On Unix, resource.getrusage is used
instead and returns the CPU user time.
-p<P>: use a precision of <P> digits to display the timing result.
Default: 3
-q: Quiet, do not print result.
-o: return a TimeitResult that can be stored in a variable to inspect
the result in more details.
.. versionchanged:: 7.3
User variables are no longer expanded,
the magic line is always left unmodified.
Examples
--------
::
In [1]: %timeit pass
8.26 ns ± 0.12 ns per loop (mean ± std. dev. of 7 runs, 100000000 loops each)
In [2]: u = None
In [3]: %timeit u is None
29.9 ns ± 0.643 ns per loop (mean ± std. dev. of 7 runs, 10000000 loops each)
In [4]: %timeit -r 4 u == None
In [5]: import time
In [6]: %timeit -n1 time.sleep(2)
The times reported by %timeit will be slightly higher than those
reported by the timeit.py script when variables are accessed. This is
due to the fact that %timeit executes the statement in the namespace
of the shell, compared with timeit.py, which uses a single setup
statement to import function or create variables. Generally, the bias
does not matter as long as results from timeit.py are not mixed with
those from %timeit.
%unalias:
Remove an alias
%unload_ext:
Unload an IPython extension by its module name.
Not all extensions can be unloaded, only those which define an
``unload_ipython_extension`` function.
%who:
Print all interactive variables, with some minimal formatting.
If any arguments are given, only variables whose type matches one of
these are printed. For example::
%who function str
will only list functions and strings, excluding all other types of
variables. To find the proper type names, simply use type(var) at a
command line to see how python prints type names. For example:
::
In [1]: type('hello')
Out[1]: <type 'str'>
indicates that the type name for strings is 'str'.
``%who`` always excludes executed names loaded through your configuration
file and things which are internal to IPython.
This is deliberate, as typically you may load many modules and the
purpose of %who is to show you only what you've manually defined.
Examples
--------
Define two variables and list them with who::
In [1]: alpha = 123
In [2]: beta = 'test'
In [3]: %who
alpha beta
In [4]: %who int
alpha
In [5]: %who str
beta
%who_ls:
Return a sorted list of all interactive variables.
If arguments are given, only variables of types matching these
arguments are returned.
Examples
--------
Define two variables and list them with who_ls::
In [1]: alpha = 123
In [2]: beta = 'test'
In [3]: %who_ls
Out[3]: ['alpha', 'beta']
In [4]: %who_ls int
Out[4]: ['alpha']
In [5]: %who_ls str
Out[5]: ['beta']
%whos:
Like %who, but gives some extra information about each variable.
The same type filtering of %who can be applied here.
For all variables, the type is printed. Additionally it prints:
- For {},[],(): their length.
- For numpy arrays, a summary with shape, number of
elements, typecode and size in memory.
- Everything else: a string representation, snipping their middle if
too long.
Examples
--------
Define two variables and list them with whos::
In [1]: alpha = 123
In [2]: beta = 'test'
In [3]: %whos
Variable Type Data/Info
--------------------------------
alpha int 123
beta str test
%xdel:
Delete a variable, trying to clear it from anywhere that
IPython's machinery has references to it. By default, this uses
the identity of the named object in the user namespace to remove
references held under other names. The object is also removed
from the output history.
Options
-n : Delete the specified name from all namespaces, without
checking their identity.
%xmode:
Switch modes for the exception handlers.
Valid modes: Plain, Context, Verbose, and Minimal.
If called without arguments, acts as a toggle.
When in verbose mode the value --show (and --hide)
will respectively show (or hide) frames with ``__tracebackhide__ =
True`` value set.
%%!:
Shell execute - run shell command and capture output (!! is short-hand).
%sx command
IPython will run the given command using commands.getoutput(), and
return the result formatted as a list (split on '\n'). Since the
output is _returned_, it will be stored in ipython's regular output
cache Out[N] and in the '_N' automatic variables.
Notes:
1) If an input line begins with '!!', then %sx is automatically
invoked. That is, while::
!ls
causes ipython to simply issue system('ls'), typing::
!!ls
is a shorthand equivalent to::
%sx ls
2) %sx differs from %sc in that %sx automatically splits into a list,
like '%sc -l'. The reason for this is to make it as easy as possible
to process line-oriented shell output via further python commands.
%sc is meant to provide much finer control, but requires more
typing.
3) Just like %sc -l, this is a list with special attributes:
::
.l (or .list) : value as list.
.n (or .nlstr): value as newline-separated string.
.s (or .spstr): value as whitespace-separated string.
This is very useful when trying to use such lists as arguments to
system commands.
%%HTML:
Alias for `%%html`.
%%SVG:
Alias for `%%svg`.
%%bash:
%%bash script magic
Run cells with bash in a subprocess.
This is a shortcut for `%%script bash`
%%capture:
::
%capture [--no-stderr] [--no-stdout] [--no-display] [output]
run the cell, capturing stdout, stderr, and IPython's rich display() calls.
positional arguments:
output The name of the variable in which to store output. This is a
utils.io.CapturedIO object with stdout/err attributes for the
text of the captured output. CapturedOutput also has a show()
method for displaying the output, and __call__ as well, so you
can use that to quickly display the output. If unspecified,
captured output is discarded.
optional arguments:
--no-stderr Don't capture stderr.
--no-stdout Don't capture stdout.
--no-display Don't capture IPython's rich display.
%%debug:
::
%debug [--breakpoint FILE:LINE] [statement ...]
Activate the interactive debugger.
This magic command support two ways of activating debugger.
One is to activate debugger before executing code. This way, you
can set a break point, to step through the code from the point.
You can use this mode by giving statements to execute and optionally
a breakpoint.
The other one is to activate debugger in post-mortem mode. You can
activate this mode simply running %debug without any argument.
If an exception has just occurred, this lets you inspect its stack
frames interactively. Note that this will always work only on the last
traceback that occurred, so you must call this quickly after an
exception that you wish to inspect has fired, because if another one
occurs, it clobbers the previous one.
If you want IPython to automatically do this on every exception, see
the %pdb magic for more details.
.. versionchanged:: 7.3
When running code, user variables are no longer expanded,
the magic line is always left unmodified.
positional arguments:
statement Code to run in debugger. You can omit this in cell
magic mode.
optional arguments:
--breakpoint <FILE:LINE>, -b <FILE:LINE>
Set break point at LINE in FILE.
%%file:
Alias for `%%writefile`.
%%html:
::
%html [--isolated]
Render the cell as a block of HTML
optional arguments:
--isolated Annotate the cell as 'isolated'. Isolated cells are rendered
inside their own <iframe> tag
%%javascript:
Run the cell block of Javascript code
%%js:
Run the cell block of Javascript code
Alias of `%%javascript`
%%latex:
Render the cell as a block of latex
The subset of latex which is support depends on the implementation in
the client. In the Jupyter Notebook, this magic only renders the subset
of latex defined by MathJax
[here](https://docs.mathjax.org/en/v2.5-latest/tex.html).
%%markdown:
Render the cell as Markdown text block
%%perl:
%%perl script magic
Run cells with perl in a subprocess.
This is a shortcut for `%%script perl`
%%prun:
Run a statement through the python code profiler.
Usage, in line mode:
%prun [options] statement
Usage, in cell mode:
%%prun [options] [statement]
code...
code...
In cell mode, the additional code lines are appended to the (possibly
empty) statement in the first line. Cell mode allows you to easily
profile multiline blocks without having to put them in a separate
function.
The given statement (which doesn't require quote marks) is run via the
python profiler in a manner similar to the profile.run() function.
Namespaces are internally managed to work correctly; profile.run
cannot be used in IPython because it makes certain assumptions about
namespaces which do not hold under IPython.
Options:
-l <limit>
you can place restrictions on what or how much of the
profile gets printed. The limit value can be:
* A string: only information for function names containing this string
is printed.
* An integer: only these many lines are printed.
* A float (between 0 and 1): this fraction of the report is printed
(for example, use a limit of 0.4 to see the topmost 40% only).
You can combine several limits with repeated use of the option. For
example, ``-l __init__ -l 5`` will print only the topmost 5 lines of
information about class constructors.
-r
return the pstats.Stats object generated by the profiling. This
object has all the information about the profile in it, and you can
later use it for further analysis or in other functions.
-s <key>
sort profile by given key. You can provide more than one key
by using the option several times: '-s key1 -s key2 -s key3...'. The
default sorting key is 'time'.
The following is copied verbatim from the profile documentation
referenced below:
When more than one key is provided, additional keys are used as
secondary criteria when the there is equality in all keys selected
before them.
Abbreviations can be used for any key names, as long as the
abbreviation is unambiguous. The following are the keys currently
defined:
============ =====================
Valid Arg Meaning
============ =====================
"calls" call count
"cumulative" cumulative time
"file" file name
"module" file name
"pcalls" primitive call count
"line" line number
"name" function name
"nfl" name/file/line
"stdname" standard name
"time" internal time
============ =====================
Note that all sorts on statistics are in descending order (placing
most time consuming items first), where as name, file, and line number
searches are in ascending order (i.e., alphabetical). The subtle
distinction between "nfl" and "stdname" is that the standard name is a
sort of the name as printed, which means that the embedded line
numbers get compared in an odd way. For example, lines 3, 20, and 40
would (if the file names were the same) appear in the string order
"20" "3" and "40". In contrast, "nfl" does a numeric compare of the
line numbers. In fact, sort_stats("nfl") is the same as
sort_stats("name", "file", "line").
-T <filename>
save profile results as shown on screen to a text
file. The profile is still shown on screen.
-D <filename>
save (via dump_stats) profile statistics to given
filename. This data is in a format understood by the pstats module, and
is generated by a call to the dump_stats() method of profile
objects. The profile is still shown on screen.
-q
suppress output to the pager. Best used with -T and/or -D above.
If you want to run complete programs under the profiler's control, use
``%run -p [prof_opts] filename.py [args to program]`` where prof_opts
contains profiler specific options as described here.
You can read the complete documentation for the profile module with::
In [1]: import profile; profile.help()
.. versionchanged:: 7.3
User variables are no longer expanded,
the magic line is always left unmodified.
%%pypy:
%%pypy script magic
Run cells with pypy in a subprocess.
This is a shortcut for `%%script pypy`
%%python:
%%python script magic
Run cells with python in a subprocess.
This is a shortcut for `%%script python`
%%python2:
%%python2 script magic
Run cells with python2 in a subprocess.
This is a shortcut for `%%script python2`
%%python3:
%%python3 script magic
Run cells with python3 in a subprocess.
This is a shortcut for `%%script python3`
%%ruby:
%%ruby script magic
Run cells with ruby in a subprocess.
This is a shortcut for `%%script ruby`
%%script:
::
%shebang [--no-raise-error] [--proc PROC] [--bg] [--err ERR] [--out OUT]
Run a cell via a shell command
The `%%script` line is like the #! line of script,
specifying a program (bash, perl, ruby, etc.) with which to run.
The rest of the cell is run by that program.
Examples
--------
::
In [1]: %%script bash
...: for i in 1 2 3; do
...: echo $i
...: done
1
2
3
optional arguments:
--no-raise-error Whether you should raise an error message in addition to a
stream on stderr if you get a nonzero exit code.
--proc PROC The variable in which to store Popen instance. This is
used only when --bg option is given.
--bg Whether to run the script in the background. If given, the
only way to see the output of the command is with
--out/err.
--err ERR The variable in which to store stderr from the script. If
the script is backgrounded, this will be the stderr
*pipe*, instead of the stderr text itself and will not be
autoclosed.
--out OUT The variable in which to store stdout from the script. If
the script is backgrounded, this will be the stdout
*pipe*, instead of the stderr text itself and will not be
auto closed.
%%sh:
%%sh script magic
Run cells with sh in a subprocess.
This is a shortcut for `%%script sh`
%%svg:
Render the cell as an SVG literal
%%sx:
Shell execute - run shell command and capture output (!! is short-hand).
%sx command
IPython will run the given command using commands.getoutput(), and
return the result formatted as a list (split on '\n'). Since the
output is _returned_, it will be stored in ipython's regular output
cache Out[N] and in the '_N' automatic variables.
Notes:
1) If an input line begins with '!!', then %sx is automatically
invoked. That is, while::
!ls
causes ipython to simply issue system('ls'), typing::
!!ls
is a shorthand equivalent to::
%sx ls
2) %sx differs from %sc in that %sx automatically splits into a list,
like '%sc -l'. The reason for this is to make it as easy as possible
to process line-oriented shell output via further python commands.
%sc is meant to provide much finer control, but requires more
typing.
3) Just like %sc -l, this is a list with special attributes:
::
.l (or .list) : value as list.
.n (or .nlstr): value as newline-separated string.
.s (or .spstr): value as whitespace-separated string.
This is very useful when trying to use such lists as arguments to
system commands.
%%system:
Shell execute - run shell command and capture output (!! is short-hand).
%sx command
IPython will run the given command using commands.getoutput(), and
return the result formatted as a list (split on '\n'). Since the
output is _returned_, it will be stored in ipython's regular output
cache Out[N] and in the '_N' automatic variables.
Notes:
1) If an input line begins with '!!', then %sx is automatically
invoked. That is, while::
!ls
causes ipython to simply issue system('ls'), typing::
!!ls
is a shorthand equivalent to::
%sx ls
2) %sx differs from %sc in that %sx automatically splits into a list,
like '%sc -l'. The reason for this is to make it as easy as possible
to process line-oriented shell output via further python commands.
%sc is meant to provide much finer control, but requires more
typing.
3) Just like %sc -l, this is a list with special attributes:
::
.l (or .list) : value as list.
.n (or .nlstr): value as newline-separated string.
.s (or .spstr): value as whitespace-separated string.
This is very useful when trying to use such lists as arguments to
system commands.
%%time:
Time execution of a Python statement or expression.
The CPU and wall clock times are printed, and the value of the
expression (if any) is returned. Note that under Win32, system time
is always reported as 0, since it can not be measured.
This function can be used both as a line and cell magic:
- In line mode you can time a single-line statement (though multiple
ones can be chained with using semicolons).
- In cell mode, you can time the cell body (a directly
following statement raises an error).
This function provides very basic timing functionality. Use the timeit
magic for more control over the measurement.
.. versionchanged:: 7.3
User variables are no longer expanded,
the magic line is always left unmodified.
Examples
--------
::
In [1]: %time 2**128
CPU times: user 0.00 s, sys: 0.00 s, total: 0.00 s
Wall time: 0.00
Out[1]: 340282366920938463463374607431768211456L
In [2]: n = 1000000
In [3]: %time sum(range(n))
CPU times: user 1.20 s, sys: 0.05 s, total: 1.25 s
Wall time: 1.37
Out[3]: 499999500000L
In [4]: %time print 'hello world'
hello world
CPU times: user 0.00 s, sys: 0.00 s, total: 0.00 s
Wall time: 0.00
.. note::
The time needed by Python to compile the given expression will be
reported if it is more than 0.1s.
In the example below, the actual exponentiation is done by Python
at compilation time, so while the expression can take a noticeable
amount of time to compute, that time is purely due to the
compilation::
In [5]: %time 3**9999;
CPU times: user 0.00 s, sys: 0.00 s, total: 0.00 s
Wall time: 0.00 s
In [6]: %time 3**999999;
CPU times: user 0.00 s, sys: 0.00 s, total: 0.00 s
Wall time: 0.00 s
Compiler : 0.78 s
%%timeit:
Time execution of a Python statement or expression
Usage, in line mode:
%timeit [-n<N> -r<R> [-t|-c] -q -p<P> -o] statement
or in cell mode:
%%timeit [-n<N> -r<R> [-t|-c] -q -p<P> -o] setup_code
code
code...
Time execution of a Python statement or expression using the timeit
module. This function can be used both as a line and cell magic:
- In line mode you can time a single-line statement (though multiple
ones can be chained with using semicolons).
- In cell mode, the statement in the first line is used as setup code
(executed but not timed) and the body of the cell is timed. The cell
body has access to any variables created in the setup code.
Options:
-n<N>: execute the given statement <N> times in a loop. If <N> is not
provided, <N> is determined so as to get sufficient accuracy.
-r<R>: number of repeats <R>, each consisting of <N> loops, and take the
best result.
Default: 7
-t: use time.time to measure the time, which is the default on Unix.
This function measures wall time.
-c: use time.clock to measure the time, which is the default on
Windows and measures wall time. On Unix, resource.getrusage is used
instead and returns the CPU user time.
-p<P>: use a precision of <P> digits to display the timing result.
Default: 3
-q: Quiet, do not print result.
-o: return a TimeitResult that can be stored in a variable to inspect
the result in more details.
.. versionchanged:: 7.3
User variables are no longer expanded,
the magic line is always left unmodified.
Examples
--------
::
In [1]: %timeit pass
8.26 ns ± 0.12 ns per loop (mean ± std. dev. of 7 runs, 100000000 loops each)
In [2]: u = None
In [3]: %timeit u is None
29.9 ns ± 0.643 ns per loop (mean ± std. dev. of 7 runs, 10000000 loops each)
In [4]: %timeit -r 4 u == None
In [5]: import time
In [6]: %timeit -n1 time.sleep(2)
The times reported by %timeit will be slightly higher than those
reported by the timeit.py script when variables are accessed. This is
due to the fact that %timeit executes the statement in the namespace
of the shell, compared with timeit.py, which uses a single setup
statement to import function or create variables. Generally, the bias
does not matter as long as results from timeit.py are not mixed with
those from %timeit.
%%writefile:
::
%writefile [-a] filename
Write the contents of the cell to a file.
The file will be overwritten unless the -a (--append) flag is specified.
positional arguments:
filename file to write
optional arguments:
-a, --append Append contents of the cell to an existing file. The file will
be created if it does not exist.
Summary of magic functions (from %lsmagic):
Available line magics:
%alias %alias_magic %autoawait %autocall %automagic %autosave %bookmark %cat %cd %clear %colors %conda %config %connect_info %cp %debug %dhist %dirs %doctest_mode %ed %edit %env %gui %hist %history %killbgscripts %ldir %less %lf %lk %ll %load %load_ext %loadpy %logoff %logon %logstart %logstate %logstop %ls %lsmagic %lx %macro %magic %man %matplotlib %mkdir %more %mv %notebook %page %pastebin %pdb %pdef %pdoc %pfile %pinfo %pinfo2 %pip %popd %pprint %precision %prun %psearch %psource %pushd %pwd %pycat %pylab %qtconsole %quickref %recall %rehashx %reload_ext %rep %rerun %reset %reset_selective %rm %rmdir %run %save %sc %set_env %store %sx %system %tb %time %timeit %unalias %unload_ext %who %who_ls %whos %xdel %xmode
Available cell magics:
%%! %%HTML %%SVG %%bash %%capture %%debug %%file %%html %%javascript %%js %%latex %%markdown %%perl %%prun %%pypy %%python %%python2 %%python3 %%ruby %%script %%sh %%svg %%sx %%system %%time %%timeit %%writefile
Automagic is ON, % prefix IS NOT needed for line magics.
Line vs cell magics:
%timeit list(range(1000))
13.6 µs ± 1.24 µs per loop (mean ± std. dev. of 7 runs, 100000 loops each)
%%timeit
list(range(10))
list(range(100))
1.28 µs ± 189 ns per loop (mean ± std. dev. of 7 runs, 1000000 loops each)
Line magics can be used even inside code blocks:
for i in range(1, 5):
    size = i*100
    print('size:', size, end=' ')
    %timeit list(range(size))
size: 100 904 ns ± 57.8 ns per loop (mean ± std. dev. of 7 runs, 1000000 loops each)
size: 200 1.33 µs ± 76.6 ns per loop (mean ± std. dev. of 7 runs, 1000000 loops each)
size: 300 2.21 µs ± 60.3 ns per loop (mean ± std. dev. of 7 runs, 100000 loops each)
size: 400 3.59 µs ± 50.2 ns per loop (mean ± std. dev. of 7 runs, 100000 loops each)
Magics can do anything they want with their input, so it doesn’t have to be valid Python:
%%bash
echo "My shell is:" $SHELL
echo "My disk usage is:"
df -h
My shell is: /bin/bash
My disk usage is:
Filesystem      Size   Used  Avail Capacity     iused      ifree %iused  Mounted on
/dev/disk1s1   466Gi   10Gi   31Gi    26%      488411 4881964469    0%   /
devfs          228Ki  228Ki    0Bi   100%         790          0  100%   /dev
/dev/disk1s2   466Gi  406Gi   31Gi    93%     5249330 4877203550    0%   /System/Volumes/Data
/dev/disk1s5   466Gi   18Gi   31Gi    38%          18 4882452862    0%   /private/var/vm
map auto_home    0Bi    0Bi    0Bi   100%           0          0  100%   /System/Volumes/Data/home
drivefs        200Gi  171Gi   29Gi    86% 18446744069414585309 4294967295 1867079359252488448%   /Volumes/GoogleDrive
/dev/disk1s4   466Gi  504Mi   31Gi     2%          57 4882452823    0%   /Volumes/Recovery
Another interesting cell magic: create any file you want locally from the notebook:
%%writefile test.txt
This is a test file!
It can contain anything I want...

And more...
Writing test.txt
!cat test.txt
This is a test file!
It can contain anything I want...

And more...
Let’s see what other magics are currently defined in the system:
%lsmagic
Available line magics:
%alias  %alias_magic  %autoawait  %autocall  %automagic  %autosave  %bookmark  %cat  %cd  %clear  %colors  %conda  %config  %connect_info  %cp  %debug  %dhist  %dirs  %doctest_mode  %ed  %edit  %env  %gui  %hist  %history  %killbgscripts  %ldir  %less  %lf  %lk  %ll  %load  %load_ext  %loadpy  %logoff  %logon  %logstart  %logstate  %logstop  %ls  %lsmagic  %lx  %macro  %magic  %man  %matplotlib  %mkdir  %more  %mv  %notebook  %page  %pastebin  %pdb  %pdef  %pdoc  %pfile  %pinfo  %pinfo2  %pip  %popd  %pprint  %precision  %prun  %psearch  %psource  %pushd  %pwd  %pycat  %pylab  %qtconsole  %quickref  %recall  %rehashx  %reload_ext  %rep  %rerun  %reset  %reset_selective  %rm  %rmdir  %run  %save  %sc  %set_env  %store  %sx  %system  %tb  %time  %timeit  %unalias  %unload_ext  %who  %who_ls  %whos  %xdel  %xmode

Available cell magics:
%%!  %%HTML  %%SVG  %%bash  %%capture  %%debug  %%file  %%html  %%javascript  %%js  %%latex  %%markdown  %%perl  %%prun  %%pypy  %%python  %%python2  %%python3  %%ruby  %%script  %%sh  %%svg  %%sx  %%system  %%time  %%timeit  %%writefile

Automagic is ON, % prefix IS NOT needed for line magics.
Writing latex
Let’s use %%latex to render a block of latex:
%%latex
$$F(k) = \int_{-\infty}^{\infty} f(x) e^{2\pi i k} \mathrm{d} x$$
Running normal Python code: execution and errors
Not only can you input normal Python code, you can even paste straight from a Python or IPython shell session:
>>> # Fibonacci series:
... # the sum of two elements defines the next
... a, b = 0, 1
>>> while b < 10:
...     print(b)
...     a, b = b, a+b
1
1
2
3
5
8
In [1]: for i in range(10):
   ...:     print(i, end=' ')
   ...:
0 1 2 3 4 5 6 7 8 9
And when your code produces errors, you can control how they are displayed with the %xmode magic:
%%writefile mod.py

def f(x):
    return 1.0/(x-1)

def g(y):
    return f(y+1)
Writing mod.py
Now let’s call the function g with an argument that would produce an error:
import mod
mod.g(0)
---------------------------------------------------------------------------
ZeroDivisionError                         Traceback (most recent call last)
/var/folders/61/0lj9r7px3k52gv9yfyx6ky300000gn/T/ipykernel_91329/434918578.py in <module>
      1 import mod
----> 2 mod.g(0)

~/google_drive/GitHub/DGPA_workshop_2022/workshop/prerequisites/mod.py in g(y)
      4
      5 def g(y):
----> 6     return f(y+1)

~/google_drive/GitHub/DGPA_workshop_2022/workshop/prerequisites/mod.py in f(x)
      1
      2 def f(x):
----> 3     return 1.0/(x-1)
      4
      5 def g(y):

ZeroDivisionError: float division by zero
%xmode plain
mod.g(0)
Exception reporting mode: Plain
Traceback (most recent call last):

  File "/var/folders/61/0lj9r7px3k52gv9yfyx6ky300000gn/T/ipykernel_91329/3998503511.py", line 2, in <module>
    mod.g(0)

  File "/Users/peerherholz/google_drive/GitHub/DGPA_workshop_2022/workshop/prerequisites/mod.py", line 6, in g
    return f(y+1)

  File "/Users/peerherholz/google_drive/GitHub/DGPA_workshop_2022/workshop/prerequisites/mod.py", line 3, in f
    return 1.0/(x-1)

ZeroDivisionError: float division by zero
%xmode verbose
mod.g(0)
Exception reporting mode: Verbose
---------------------------------------------------------------------------
ZeroDivisionError                         Traceback (most recent call last)
/var/folders/61/0lj9r7px3k52gv9yfyx6ky300000gn/T/ipykernel_91329/2816820657.py in <module>
      1 get_ipython().run_line_magic('xmode', 'verbose')
----> 2 mod.g(0)
        global mod.g = <function g at 0x104cf84c0>

~/google_drive/GitHub/DGPA_workshop_2022/workshop/prerequisites/mod.py in g(y=0)
      4
      5 def g(y):
----> 6     return f(y+1)
        global f = <function f at 0x1030afca0>
        y = 0

~/google_drive/GitHub/DGPA_workshop_2022/workshop/prerequisites/mod.py in f(x=1)
      1
      2 def f(x):
----> 3     return 1.0/(x-1)
        x = 1
      4
      5 def g(y):

ZeroDivisionError: float division by zero
The default %xmode is “context”, which shows additional context but not all local variables. Let’s restore that one for the rest of our session.
%xmode context
Exception reporting mode: Context
Running code in other languages with special %% magics
%%perl
@months = ("July", "August", "September");
print $months[0];
July
%%ruby
name = "world"
puts "Hello #{name.capitalize}!"
Hello World!
/System/Library/Frameworks/Ruby.framework/Versions/2.6/usr/lib/ruby/2.6.0/universal-darwin19/rbconfig.rb:229: warning: Insecure world writable dir /Users/peerherholz in PATH, mode 040707
Raw Input in the notebook
Since 1.0 the IPython notebook web application supports raw_input which for example allow us to invoke the %debug magic in the notebook:
mod.g(0)
---------------------------------------------------------------------------
ZeroDivisionError                         Traceback (most recent call last)
/var/folders/61/0lj9r7px3k52gv9yfyx6ky300000gn/T/ipykernel_91329/4151852588.py in <module>
----> 1 mod.g(0)

~/google_drive/GitHub/DGPA_workshop_2022/workshop/prerequisites/mod.py in g(y)
      4
      5 def g(y):
----> 6     return f(y+1)

~/google_drive/GitHub/DGPA_workshop_2022/workshop/prerequisites/mod.py in f(x)
      1
      2 def f(x):
----> 3     return 1.0/(x-1)
      4
      5 def g(y):

ZeroDivisionError: float division by zero
%debug
> /Users/peerherholz/google_drive/GitHub/DGPA_workshop_2022/workshop/prerequisites/mod.py(3)f()
      1
      2 def f(x):
----> 3     return 1.0/(x-1)
      4
      5 def g(y):

--KeyboardInterrupt--

KeyboardInterrupt: Interrupted by user
Don’t forget to exit your debugging session. Raw input can of course be used to ask for user input:
enjoy = input('Are you enjoying this tutorial? ')
print('enjoy is:', enjoy)
enjoy is: yes
Plotting in the notebook
Notebooks support a variety of fantastic plotting options, including static and interactive graphics. This magic configures matplotlib to render its figures inline:
%matplotlib inline
import numpy as np
import matplotlib.pyplot as plt
x = np.linspace(0, 2*np.pi, 300)
y = np.sin(x**2)
plt.plot(x, y)
plt.title("A little chirp")
fig = plt.gcf()  # let's keep the figure object around for later...
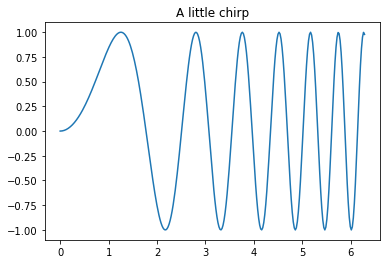
import plotly.figure_factory as ff

# Add histogram data
x1 = np.random.randn(200) - 2
x2 = np.random.randn(200)
x3 = np.random.randn(200) + 2
x4 = np.random.randn(200) + 4

# Group data together
hist_data = [x1, x2, x3, x4]

group_labels = ['Group 1', 'Group 2', 'Group 3', 'Group 4']

# Create distplot with custom bin_size
fig = ff.create_distplot(hist_data, group_labels, bin_size=.2)
fig.show()
The IPython kernel/client model
%connect_info
{
  "shell_port": 9007,
  "iopub_port": 9009,
  "stdin_port": 9008,
  "control_port": 9006,
  "hb_port": 9005,
  "ip": "127.0.0.1",
  "key": "06de83f0-3e03-43c3-abec-5aa8e443170c",
  "transport": "tcp",
  "signature_scheme": "hmac-sha256",
  "kernel_name": ""
}

Paste the above JSON into a file, and connect with:
    $> jupyter <app> --existing <file>
or, if you are local, you can connect with just:
    $> jupyter <app> --existing /var/folders/61/0lj9r7px3k52gv9yfyx6ky300000gn/T/tmp-571231AoTuwMSUHcM.json
or even just:
    $> jupyter <app> --existing
if this is the most recent Jupyter kernel you have started.
We can connect automatically a Qt Console to the currently running kernel with the %qtconsole magic, or by typing ipython console --existing <kernel-UUID> in any terminal:
%qtconsole
Saving a Notebook
Jupyter Notebooks autosave, so you don’t have to worry about losing code too much. At the top of the page you can usually see the current save status:
Last Checkpoint: 2 minutes ago (unsaved changes)
Last Checkpoint: a few seconds ago (autosaved)
If you want to save a notebook on purpose, either click on File > Save and Checkpoint or press Ctrl+S.
To Jupyter & beyond
Open a terminal
Type
jupyter lab
If you’re not automatically directed to a webpage copy the URL printed in the terminal and paste it in your browser
Click “New” in the top-right corner and select “Python 3”
You have a
Jupyter notebookwithinJupyter lab!